How we did our own DIY Window Trim
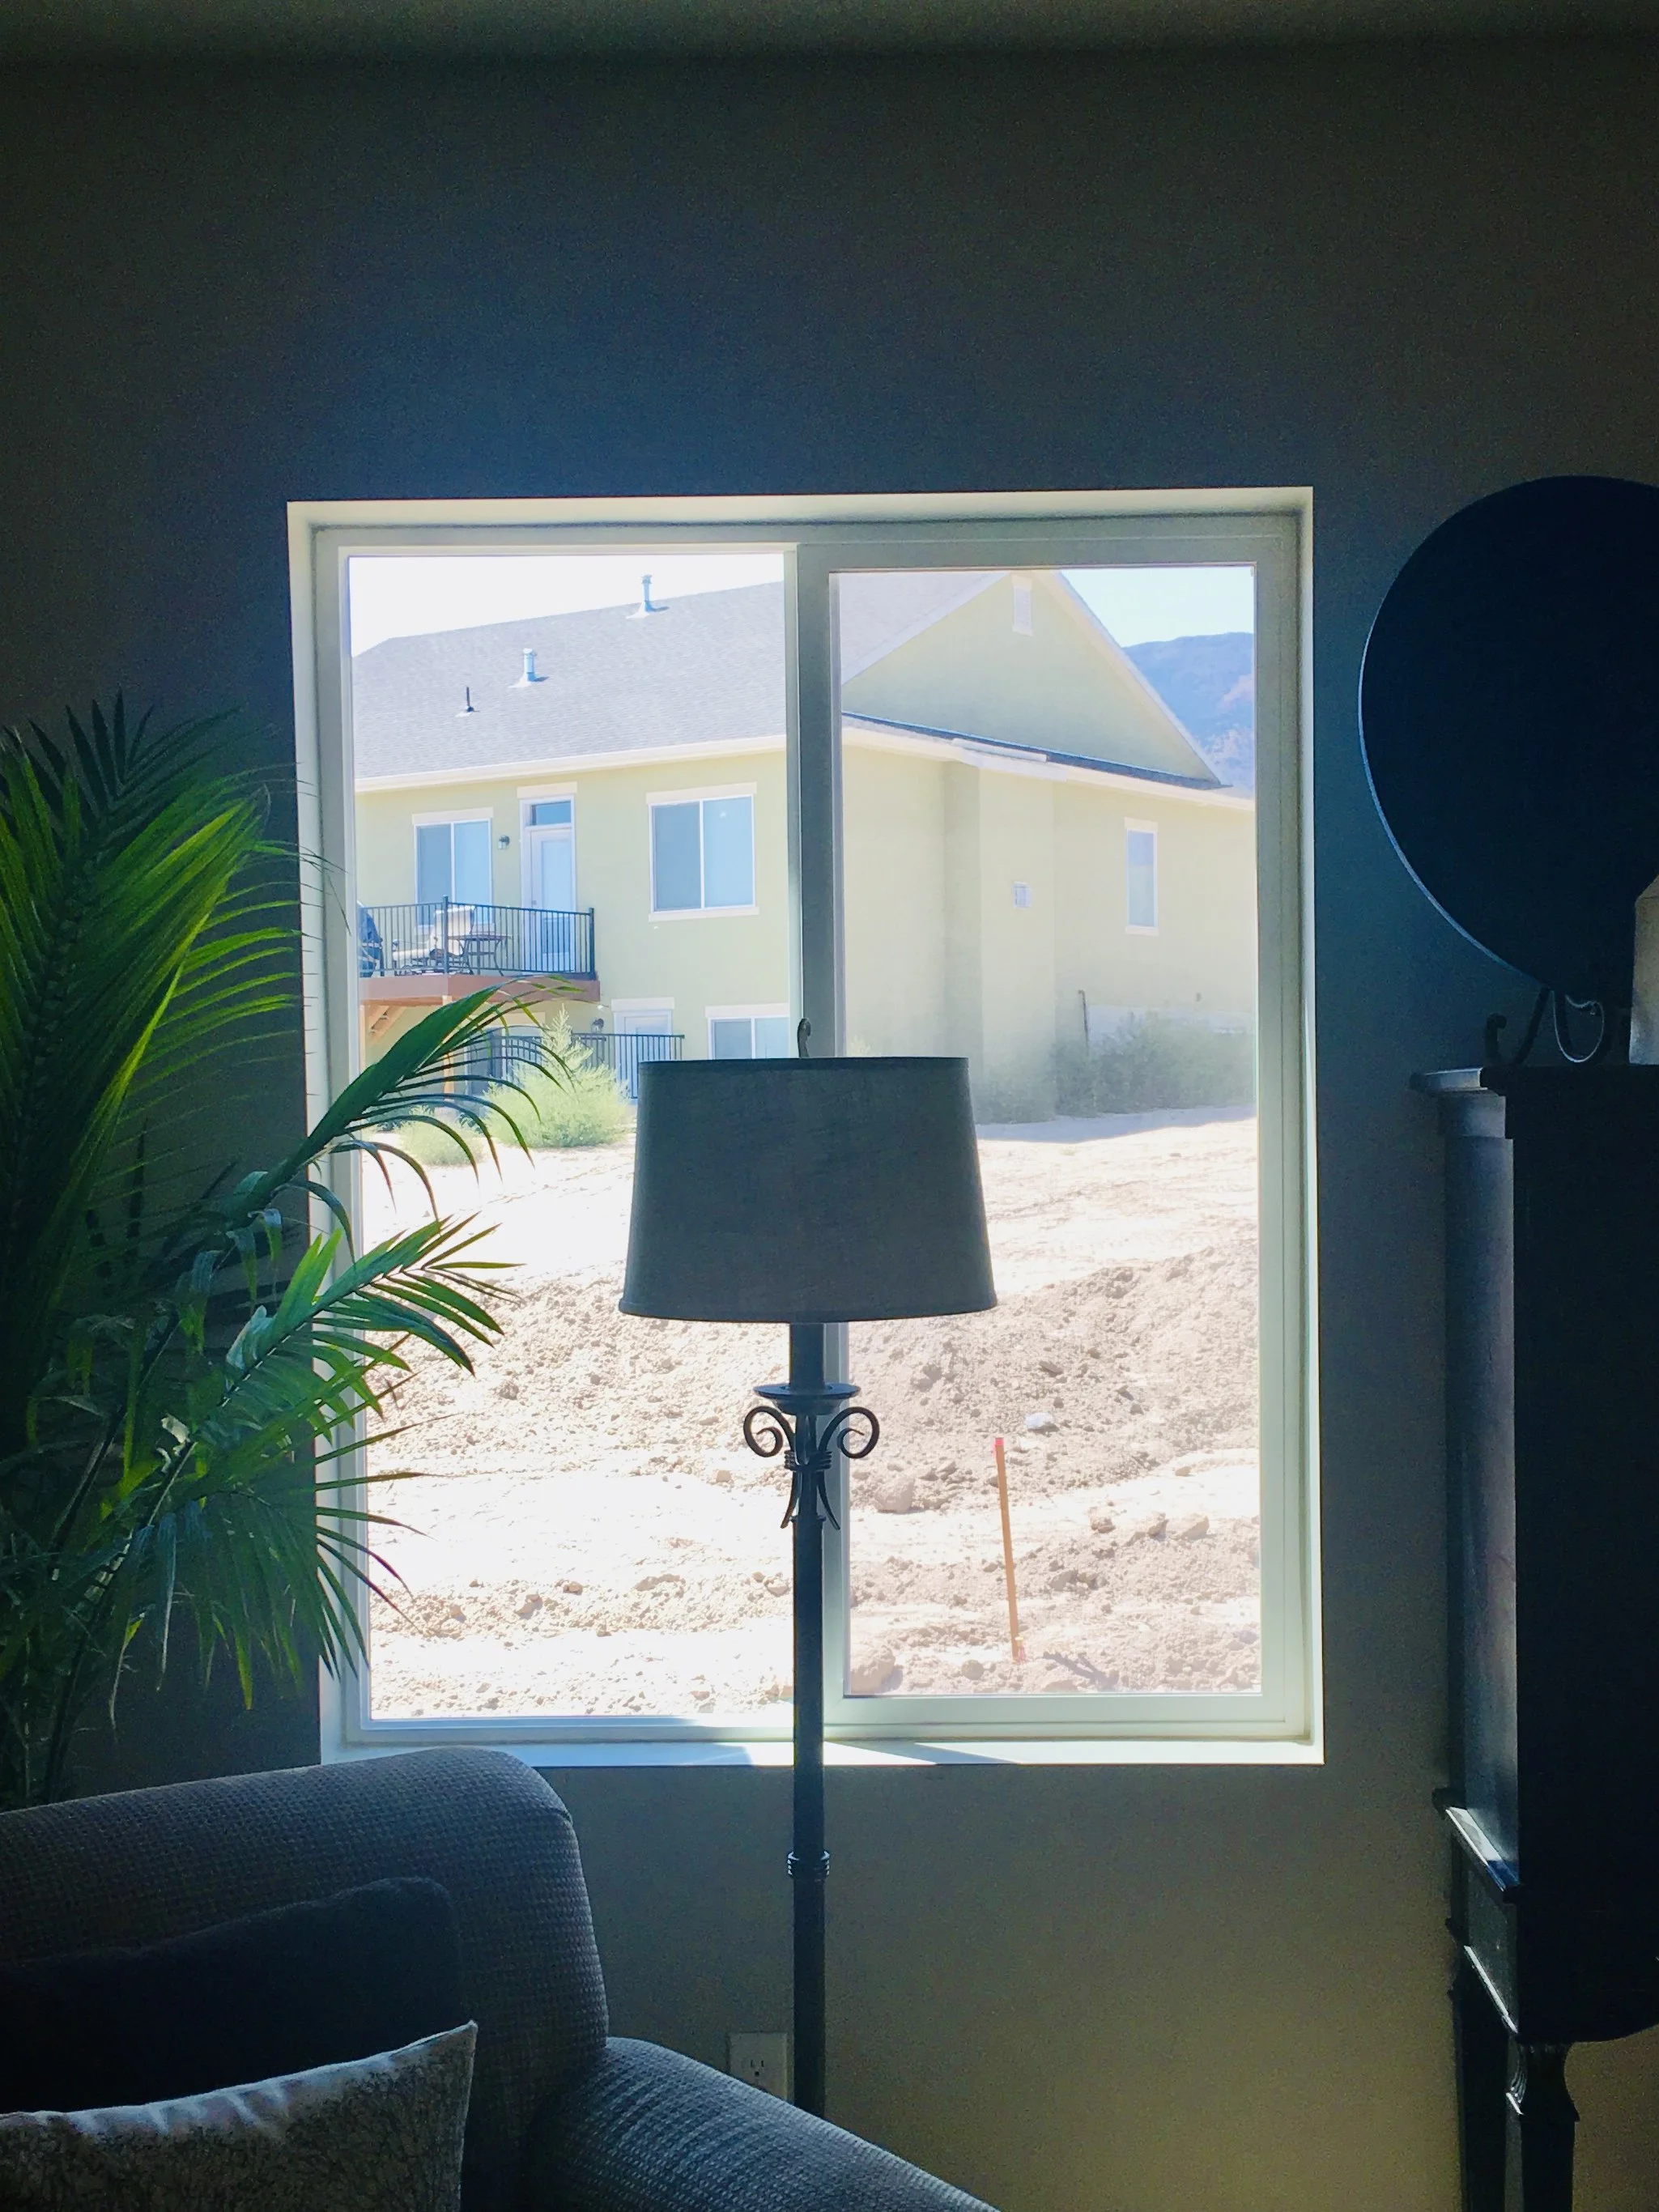
Window BEFORE- so naked!
It all started when…
We moved into our home and noticed the naked windows. We bought a spec home, and some nice upgrades had been done, but there was no trim around the windows. Apparently that was an $800 upgrade PER WINDOW! (I might be exaggerating, I can’t remember what I was told by a neighbor, but it was a lot!). Anyway, I want you to notice there wasn’t even a window sill, just painted drywall, who does that? Builders nowadays, I guess. I thought, in my lil’ brain, I can do my own window trim for way less than that, and it’s probably not even that hard. Well, I learned it’s NOT that hard, pretty cheap, time consuming, but way worth it! I’ll even tell you all the dirt on myself, and tell you the things I did wrong so you can breeze through the process. And by breeze, I mean more like a strong gale, but more on that later.
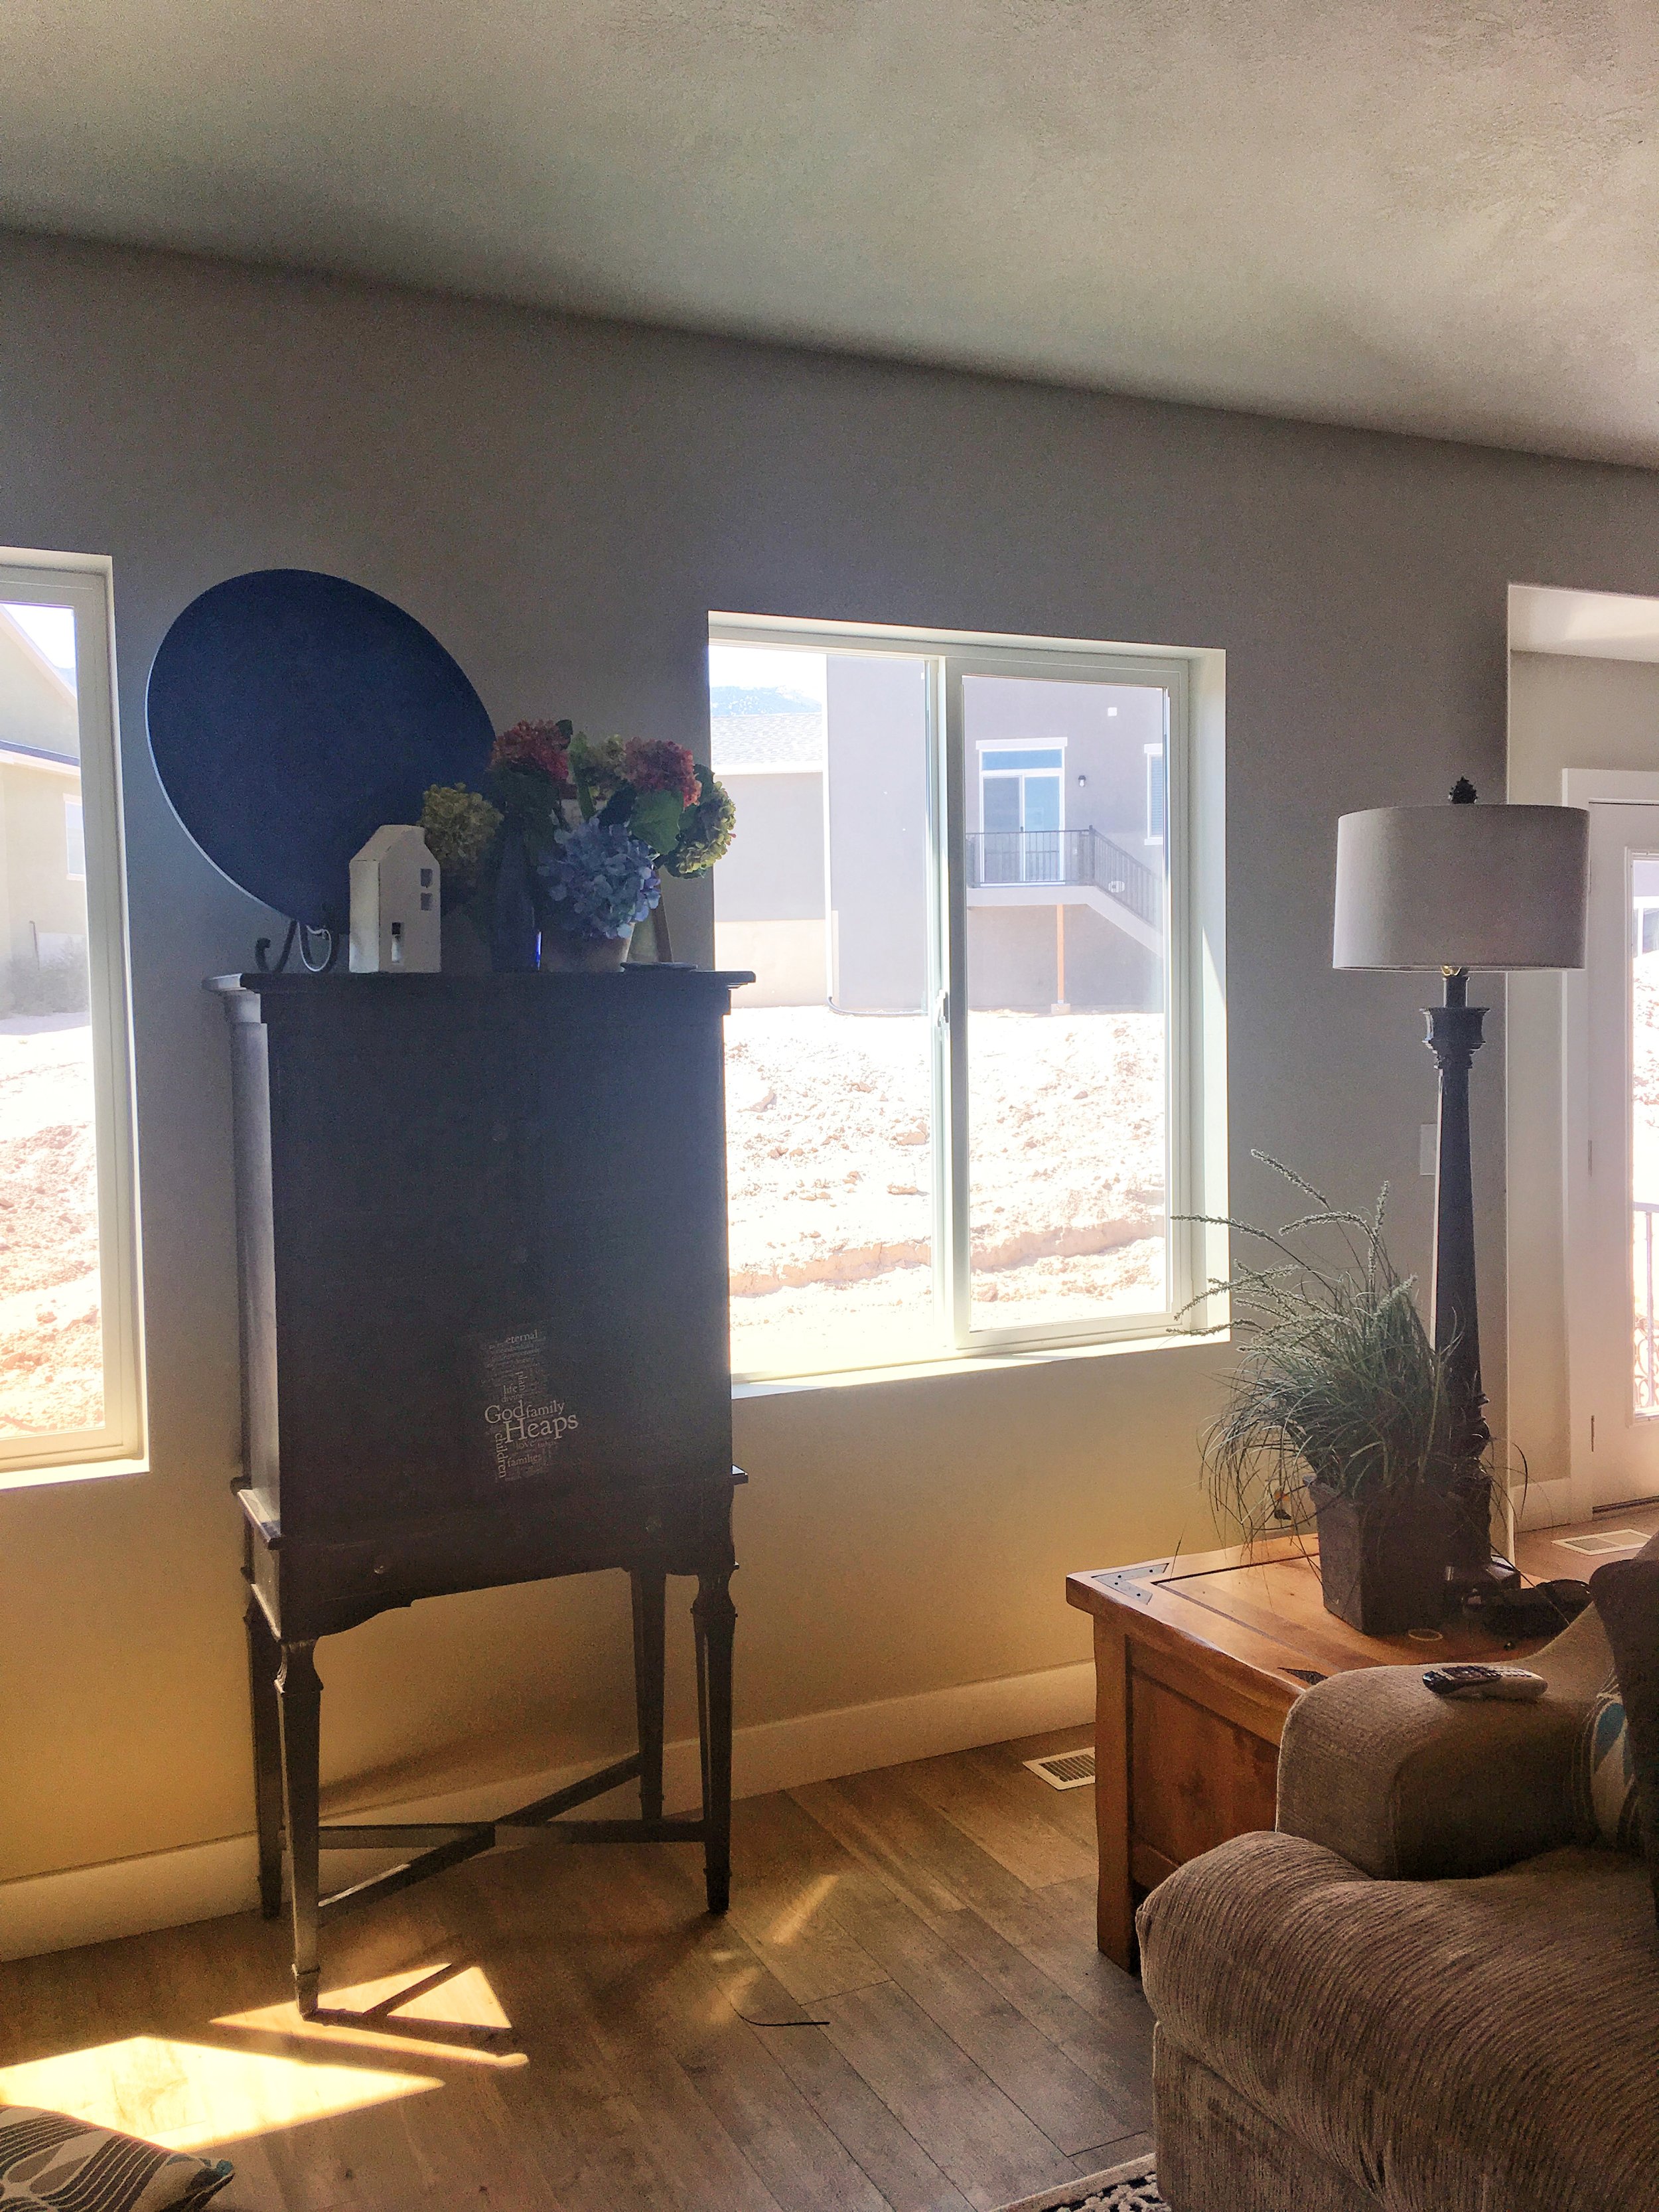
Another view of windows before trim was added.
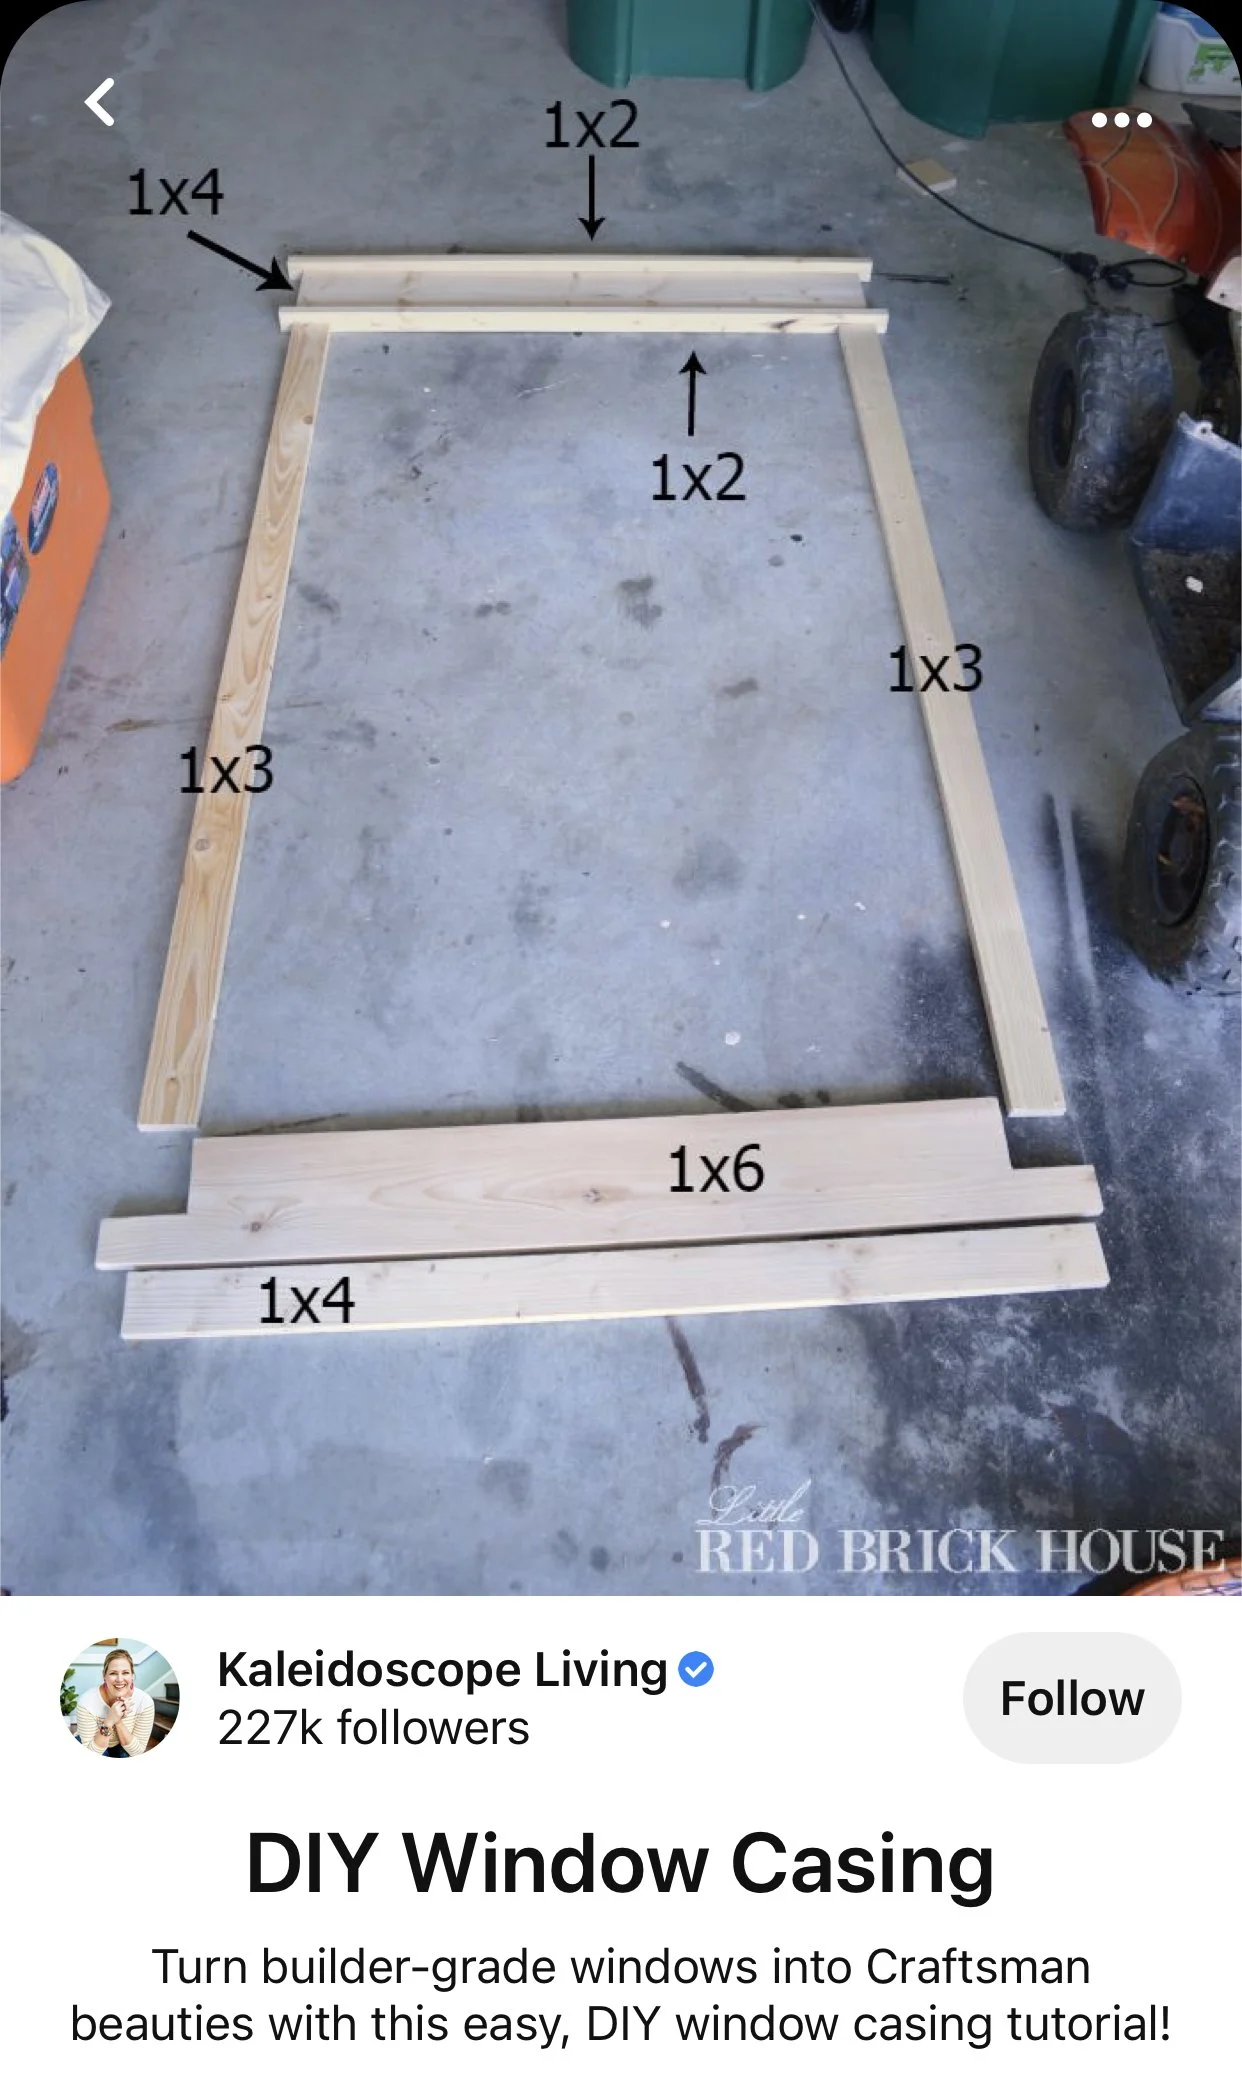
So, first of all, I went to Pinterest to do some hardcore pinning of all the ideas/directions/lessons/InSpIrAtIoN that I could find. Let me say, I have NEVER done this kind of project before, but you know, people made it seem pretty easy and I was so INSPIRED by these DIY’ers! There was one picture and one site that helped me SO MUCH with my DIY window trim.
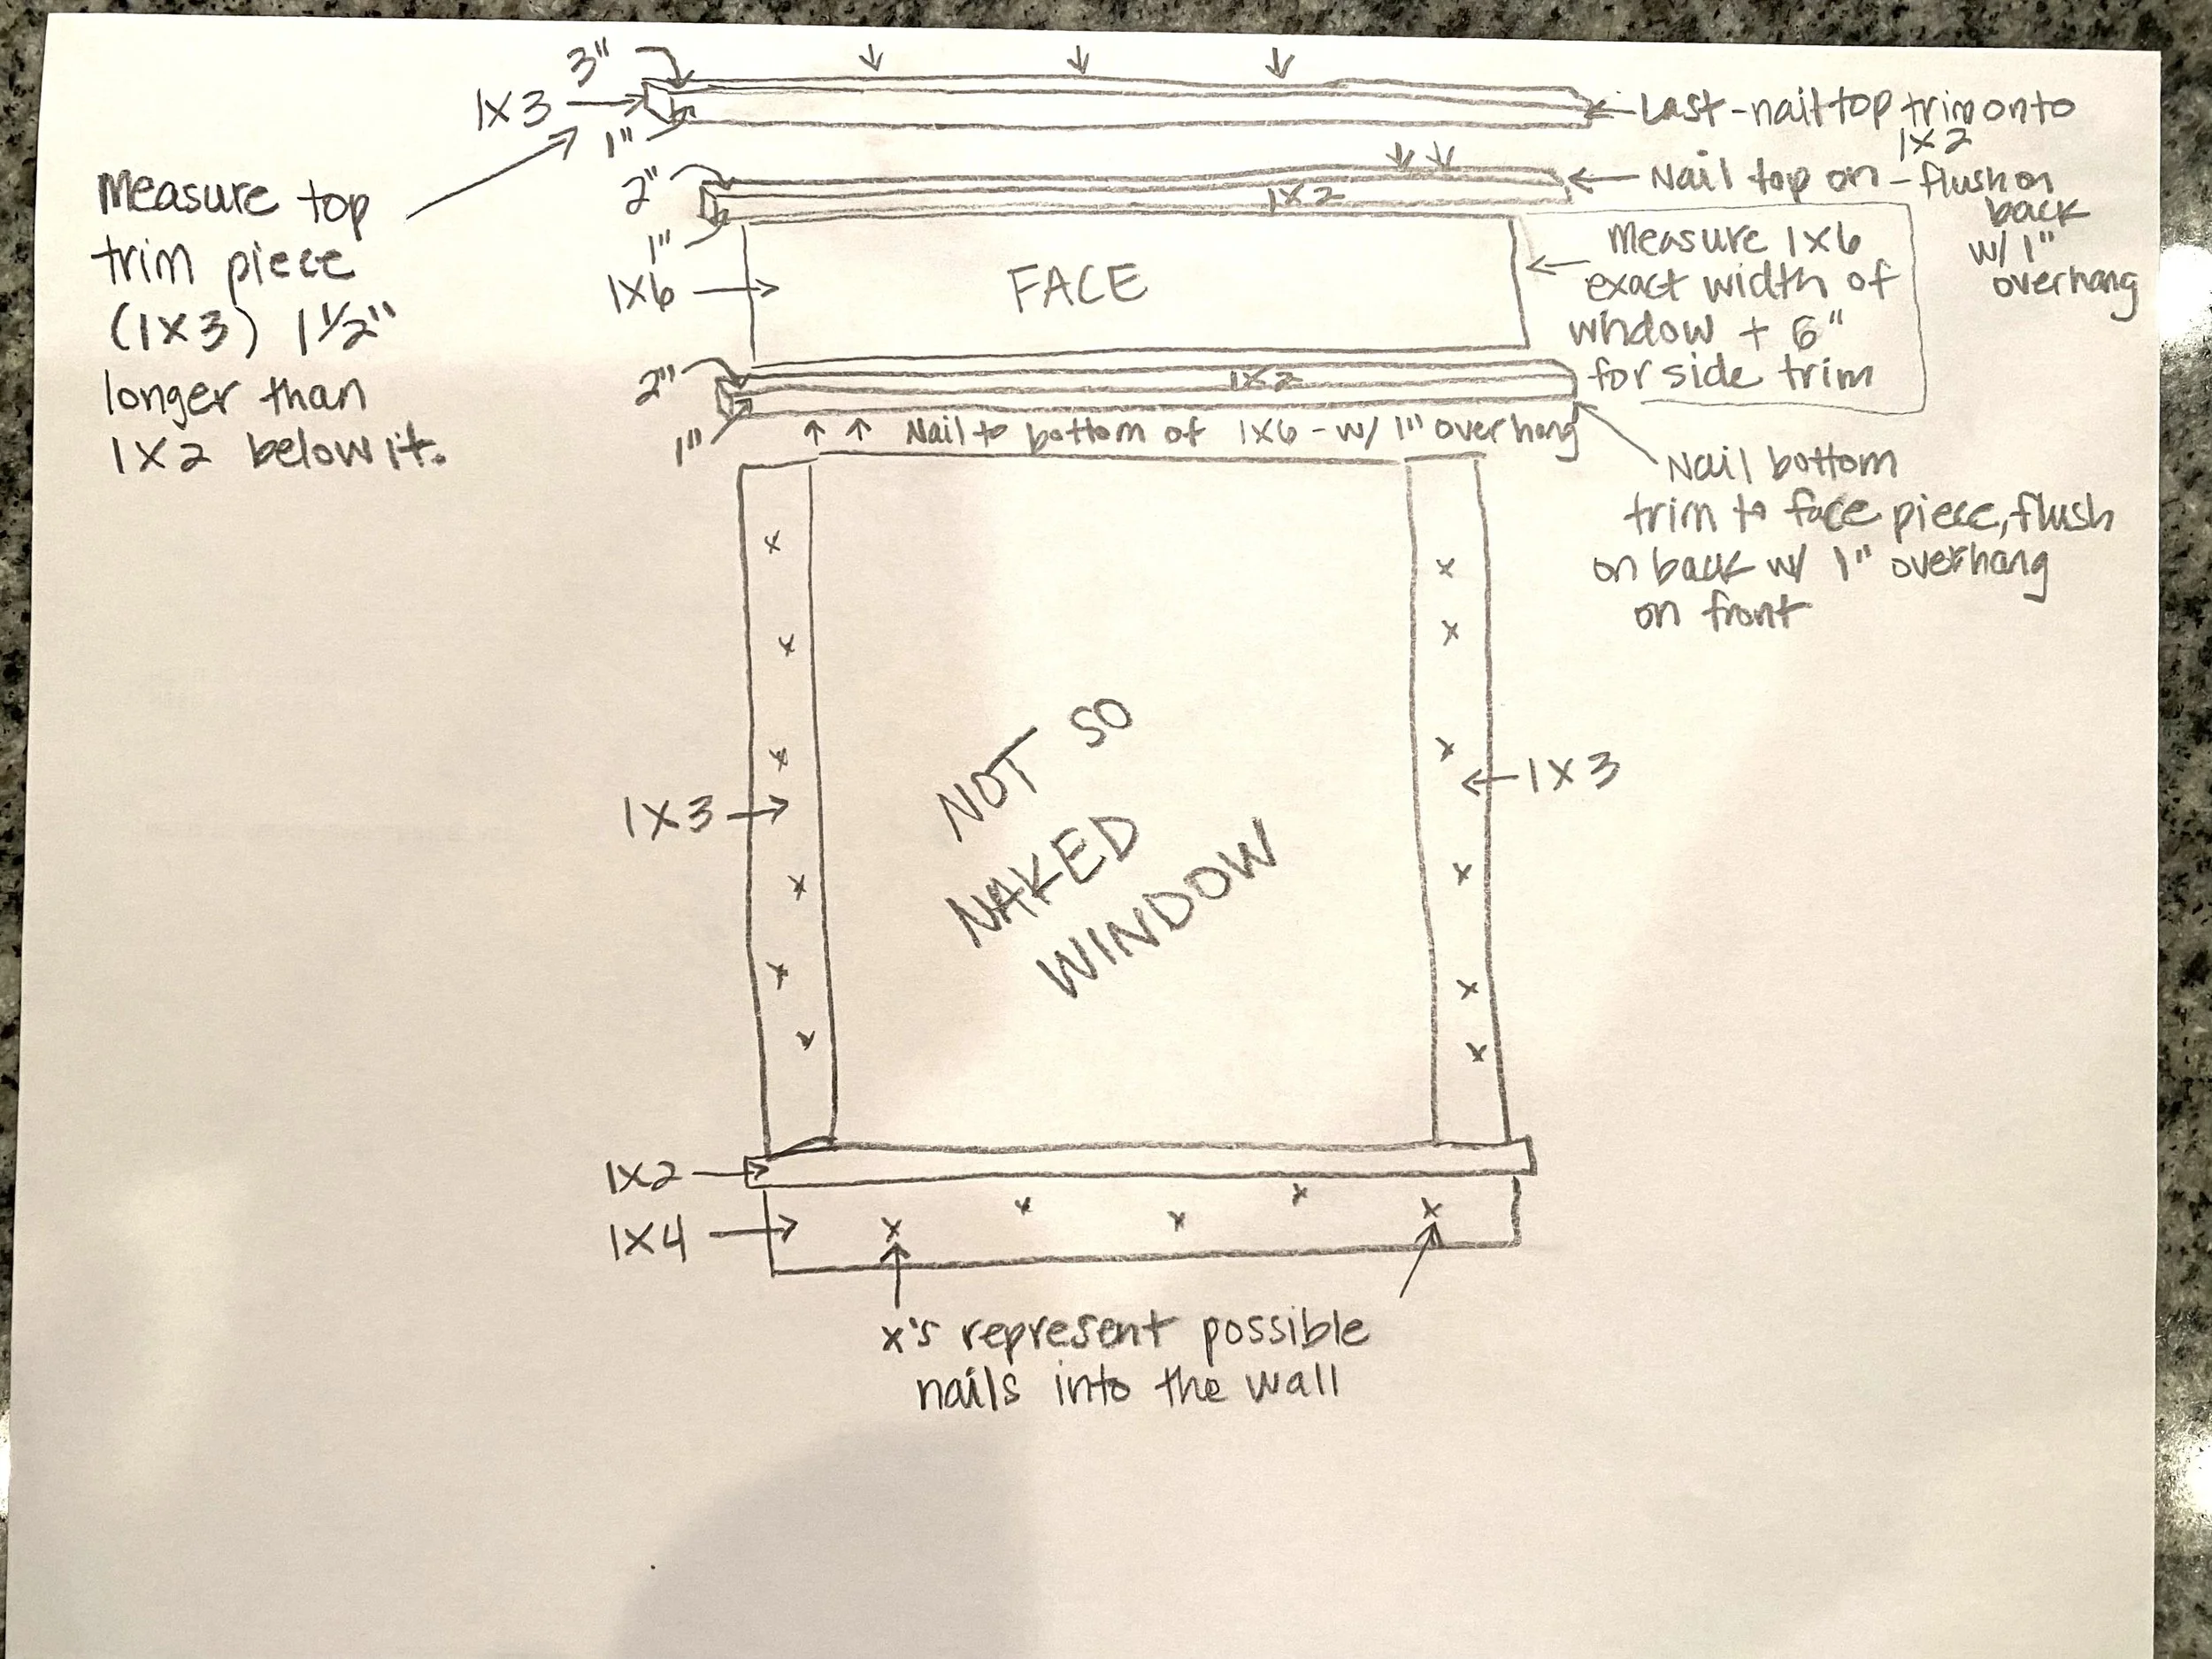
Once I got the gist of how to do it and it made sense to me, it was easy to put up. Here’s my chicken scratch directions. (Seriously, go over to Designertrapped.com to learn like I did if this doesn’t make sense to you.)
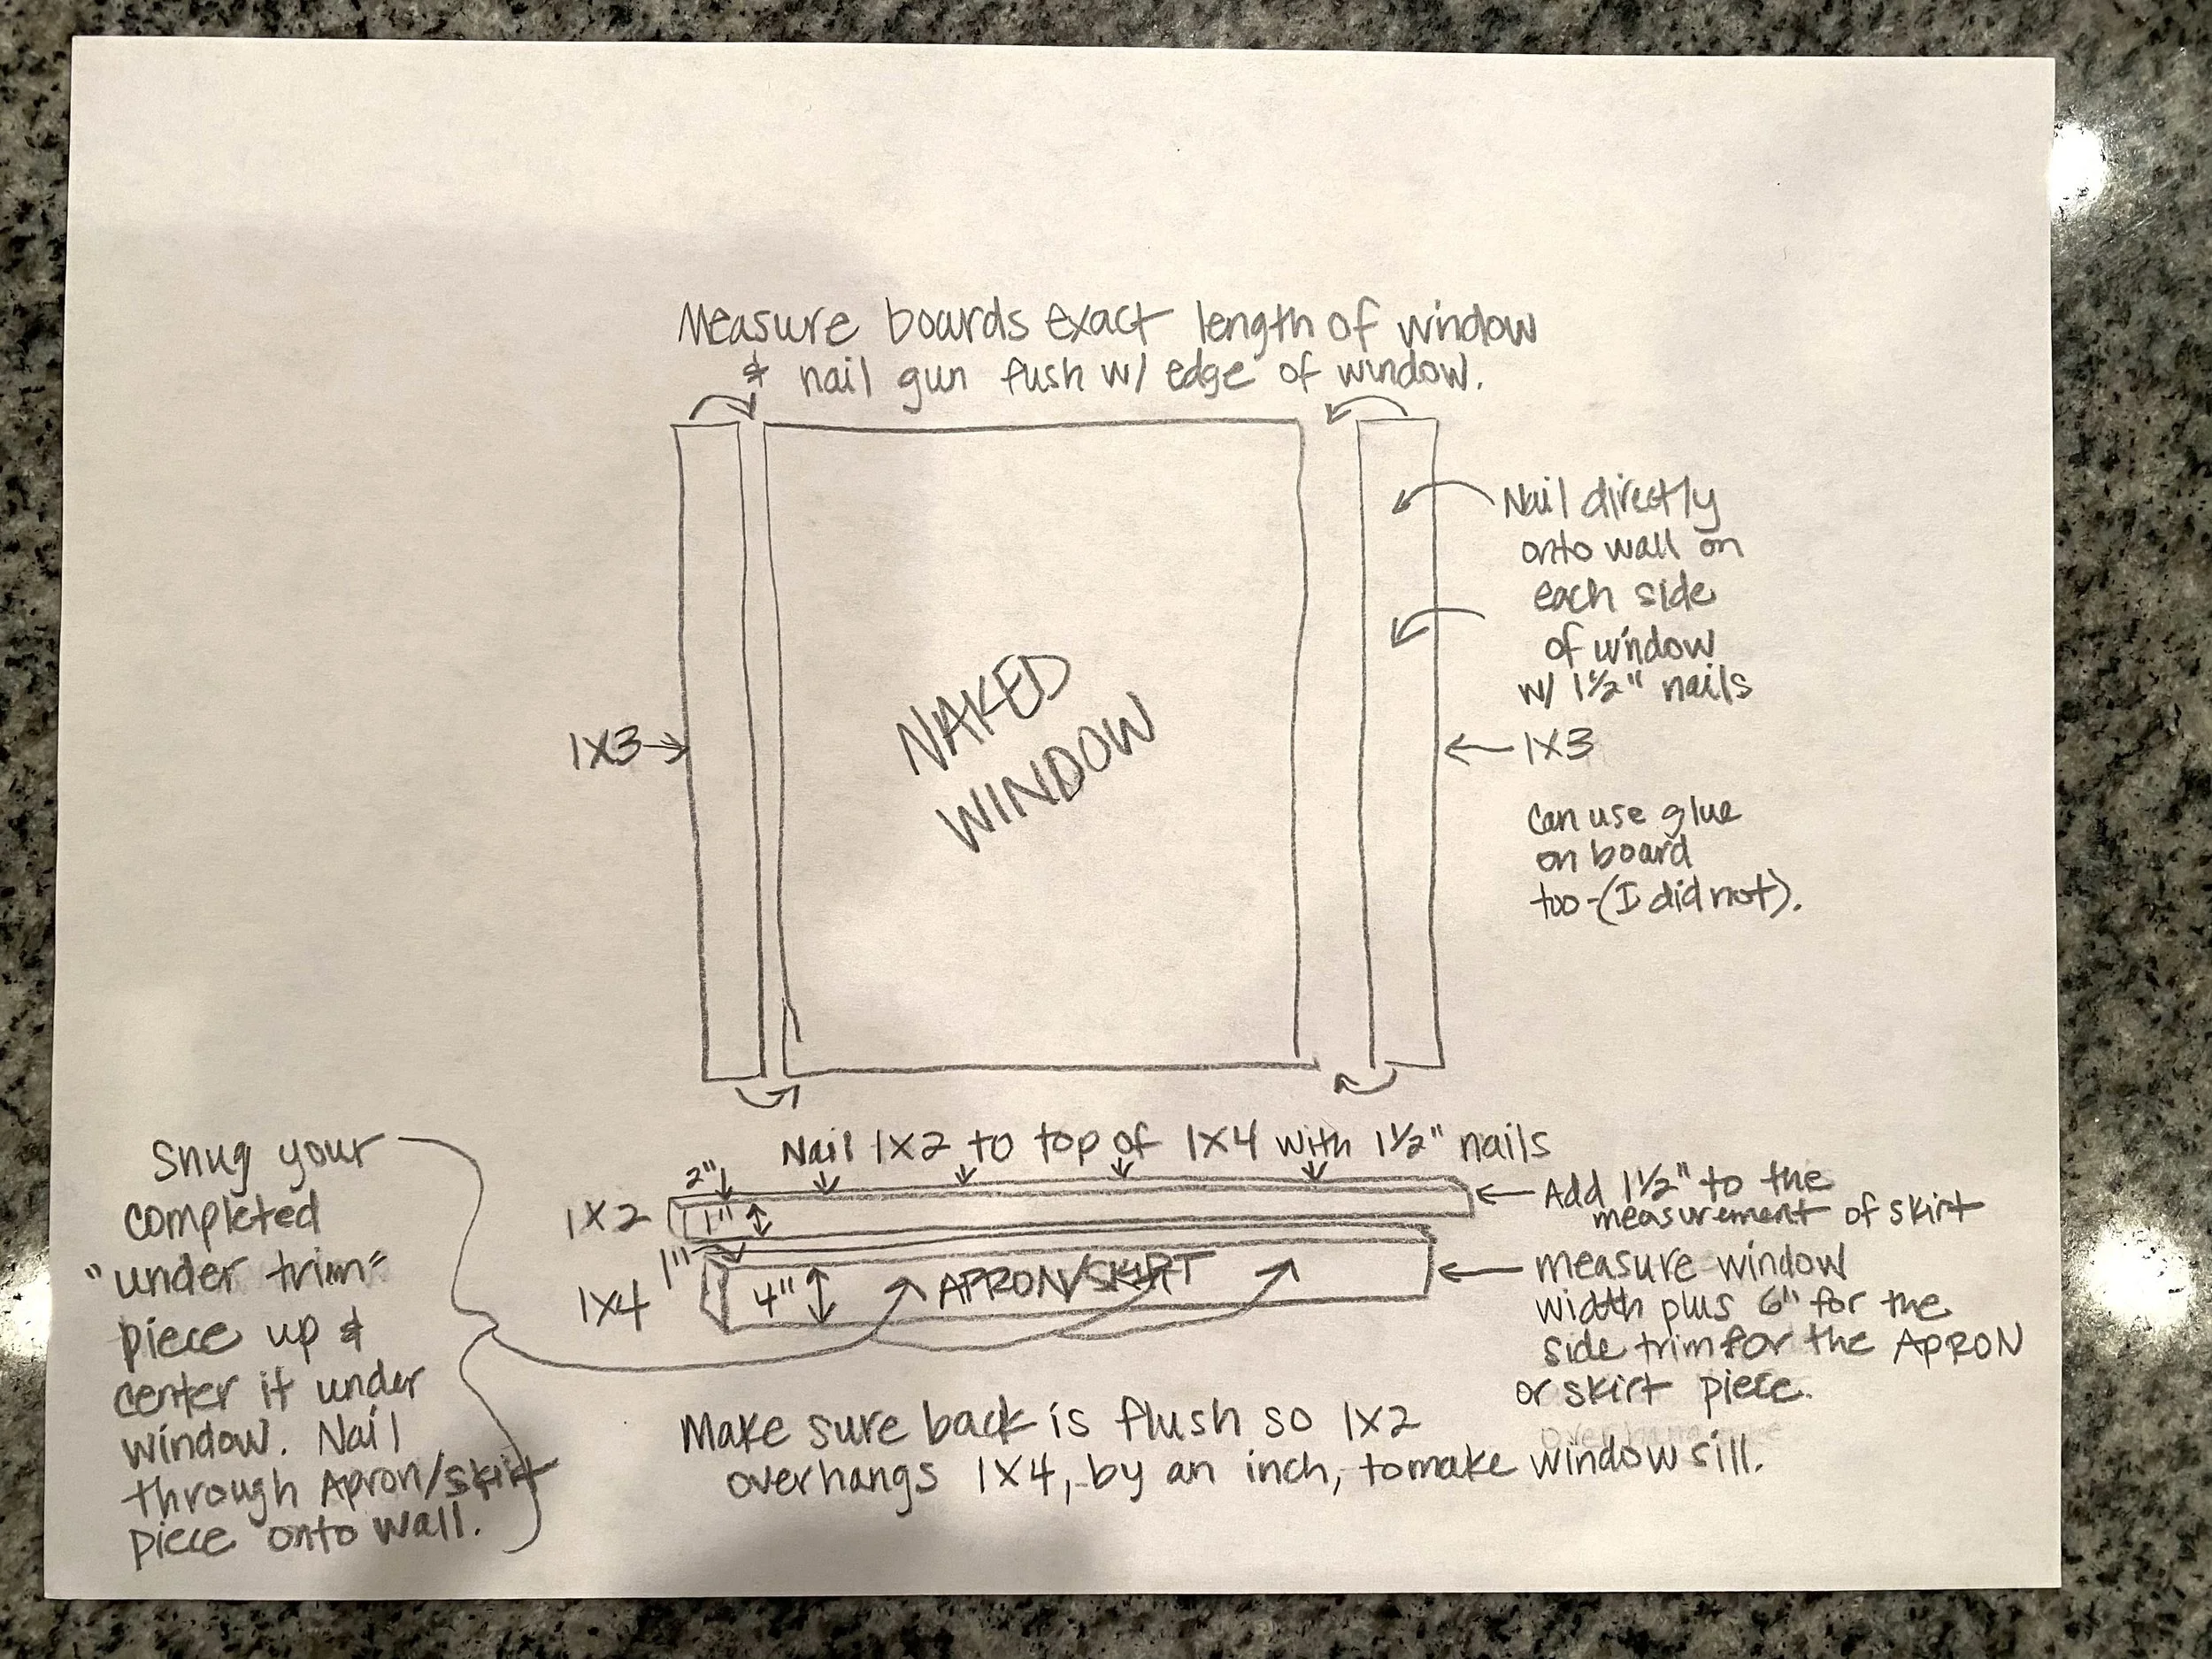
DIY Instructions on making your own window trim, step 1.
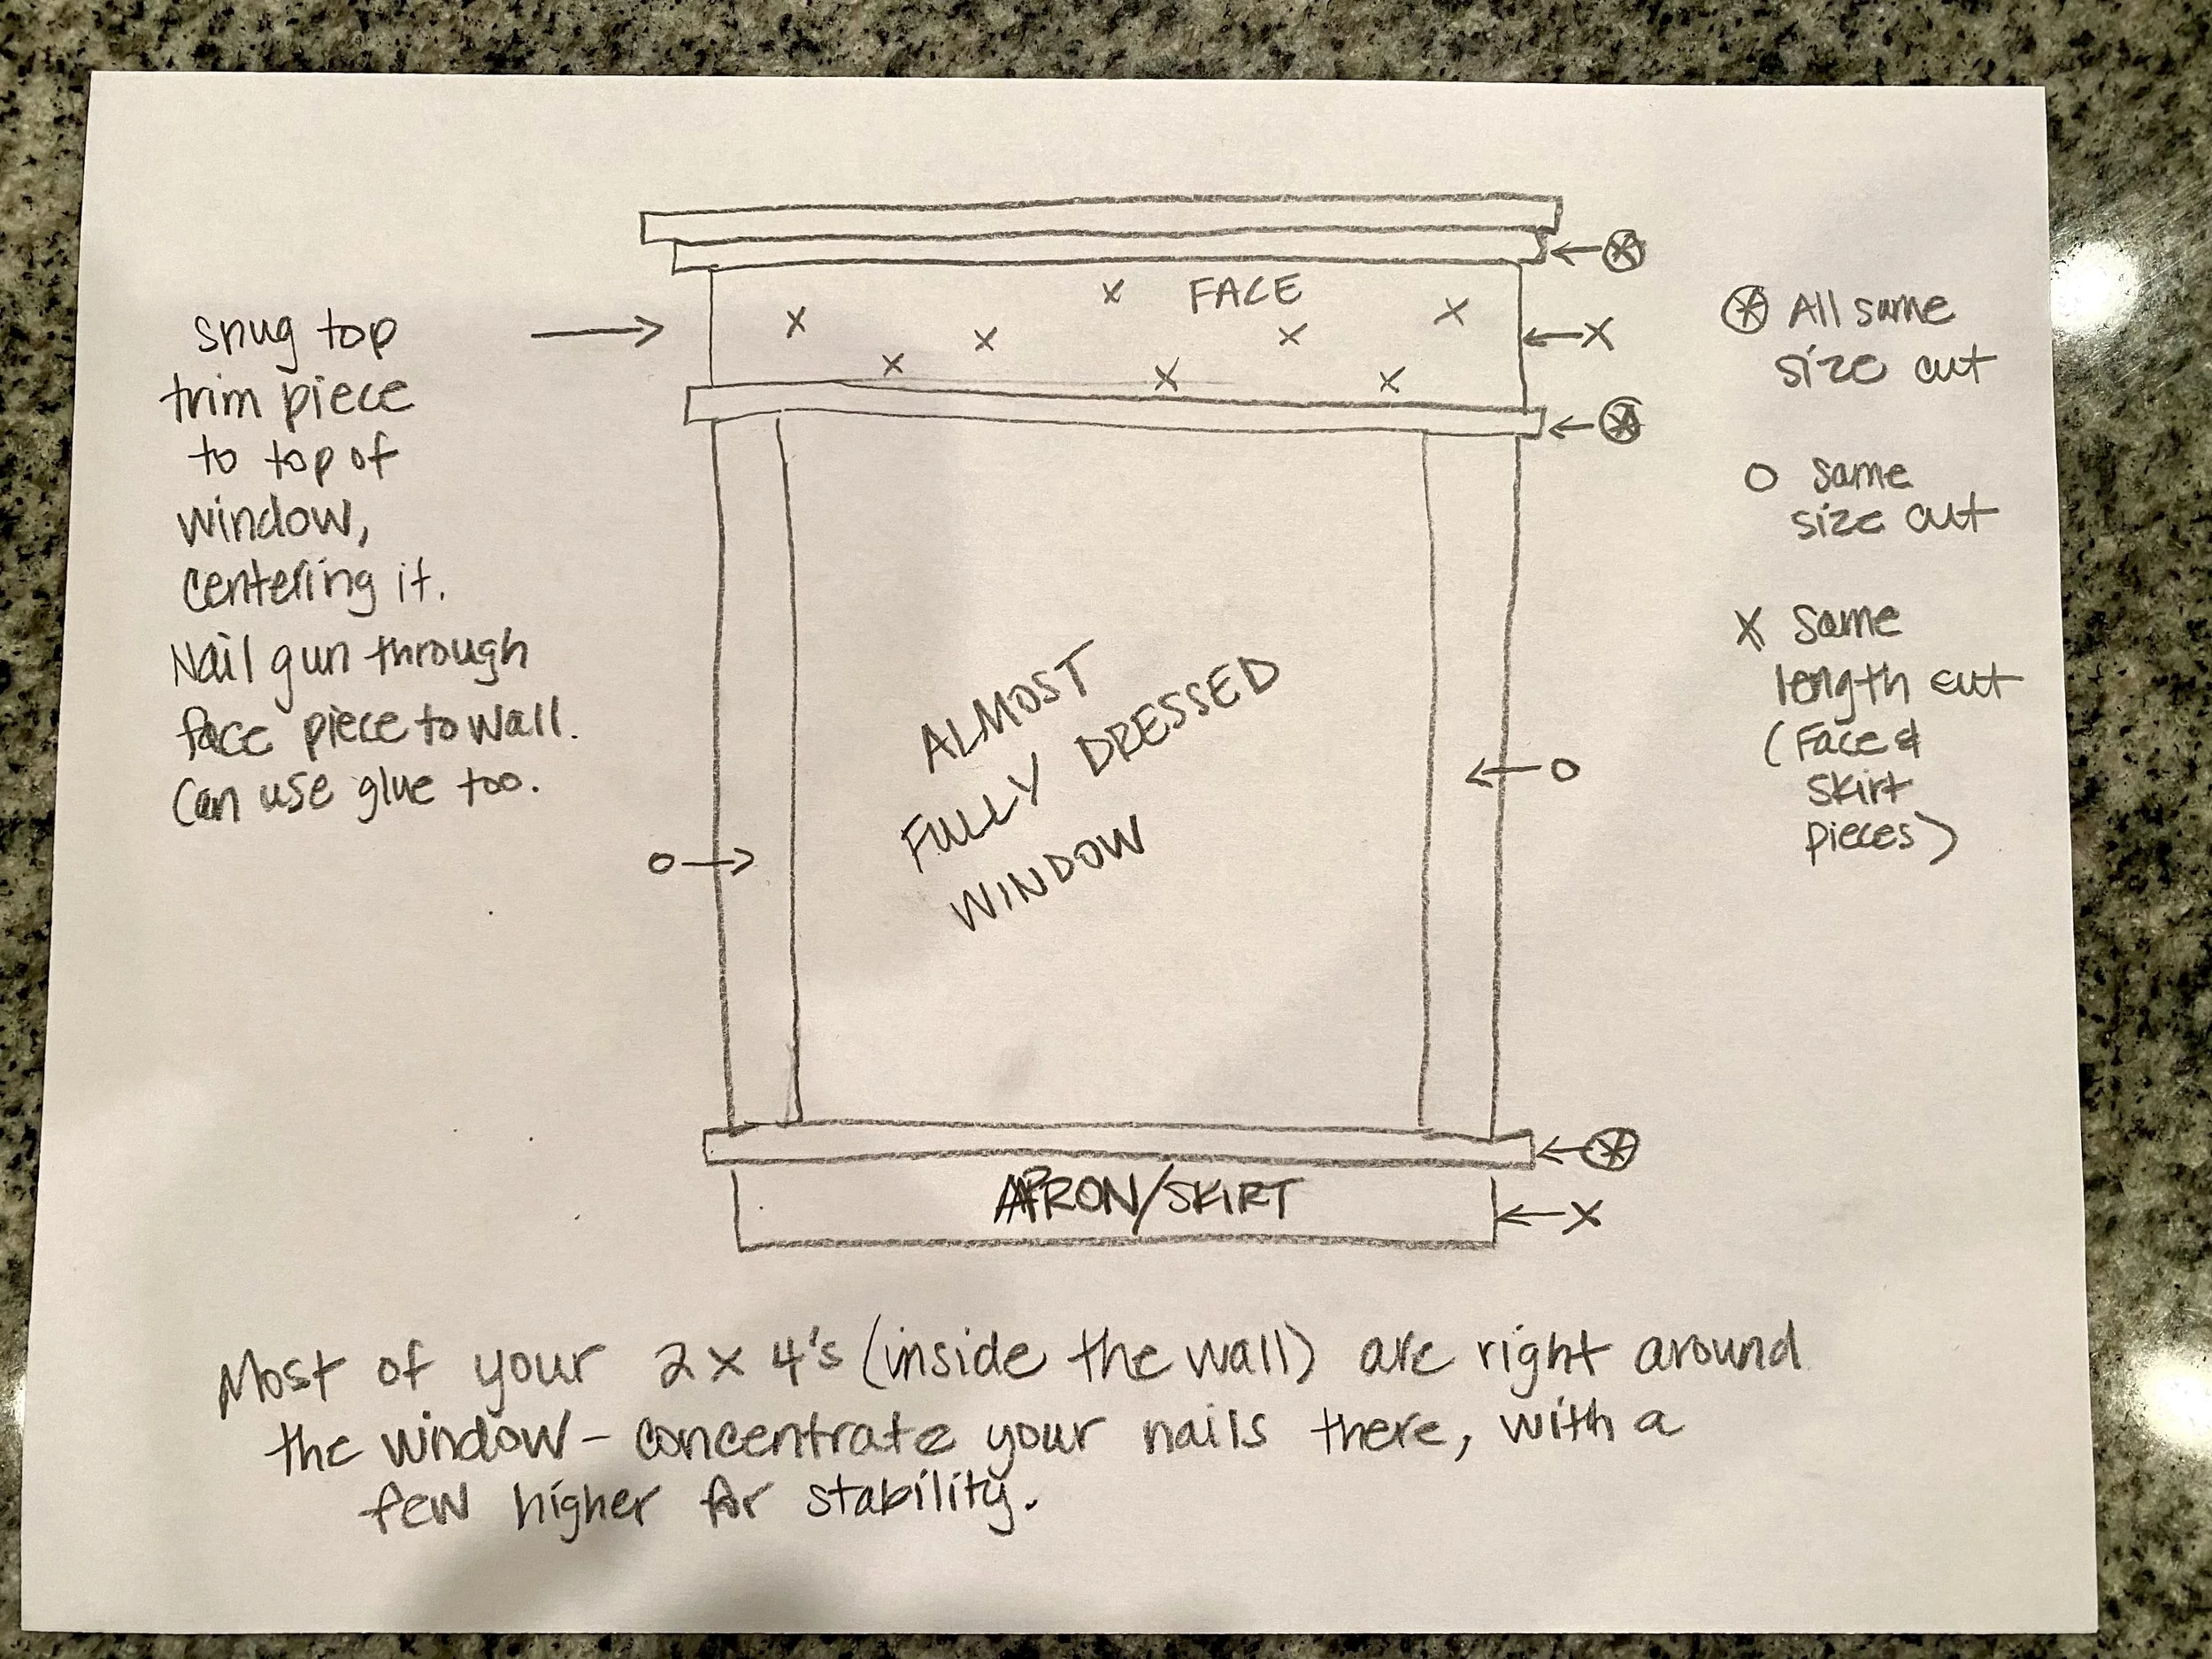
DIY Instructions on making your own window trim, step 2.
DIY Instructions on making your own window trim, step 3.
After measuring at least three times before cutting (haha, but seriously) I put up the side trim pieces, just nail gunned them right to the wall, flush with the edge of the window and making sure the top of it was level. Then we built the bottom piece. I didn’t have a jig saw to notch the sill piece, so I just added another 1x2 to the top of the skirt/apron piece to sort of give it the look of a sill. Once that was nailed onto the apron piece, I snugged it up under the side trim pieces, making sure it lined up with the bottom of the “sill”, leveled it, centered it and nailed gunned it in through the skirt/apron piece. Then we built the top piece, brought it in and put it on top across the trim pieces, leveled it, centered it and nailed it to the wall through the face piece. Keep most of your nails closer to the window itself (within 4-5 inches) you want to nail into the window frame 2x4’s that are inside your wall.
This is what it looked like when the raw trim was up!
Huge mistake #1- I read, from the blog instructions that said to fill all the holes with filler, etc AND I read about priming the wood. ALAS (what does “alas” mean anyway), I DID NOT PRIME. I filled the nail holes and all the knots in the pine with filler. I had heard about the “Tanins” leaking through paint (I don’t know what a tanin is.). But I just thought to myself that I’ll paint extra layers of paint on. I’m a rookie, didn’t I tell you that I’ve never undertaken a project like this before? Well, it’s true. The trim stayed lovely and white for almost a YEAR!! “I’m in the clear” I thought, “I cheated the Tanins and won” I thought. Well…
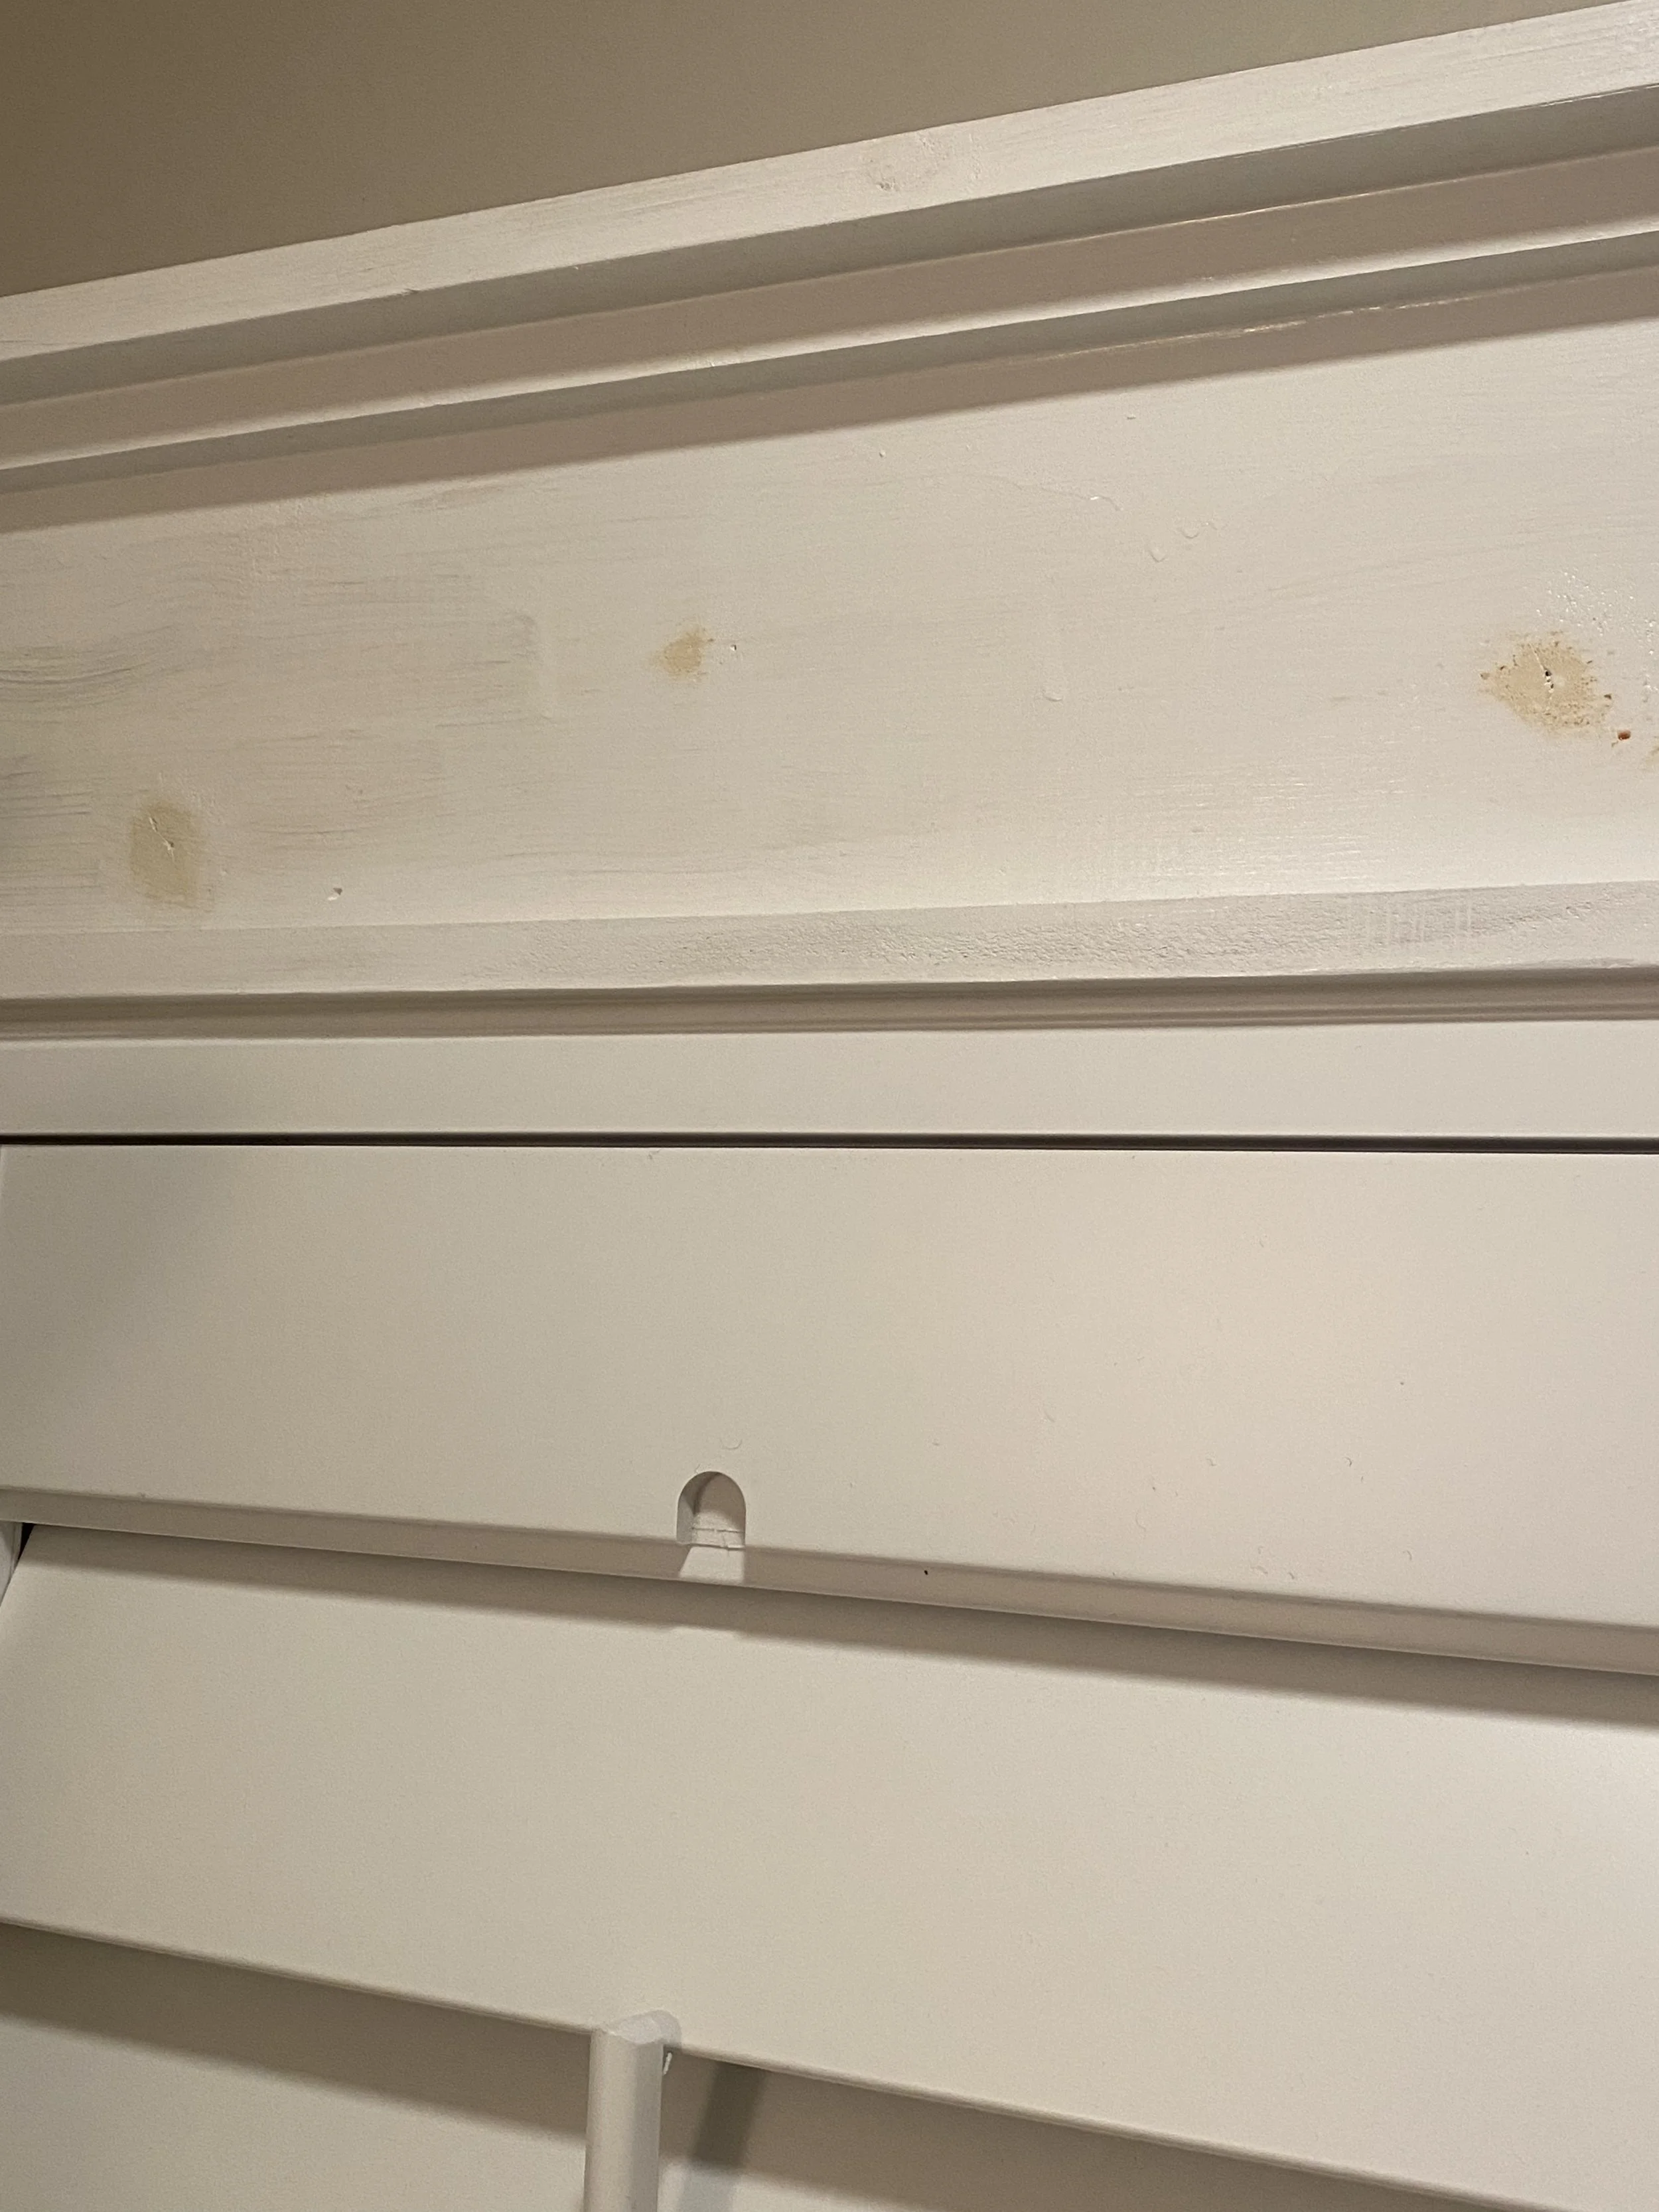
Tanins leaking through the paint, in the bathroom. UGH!!!
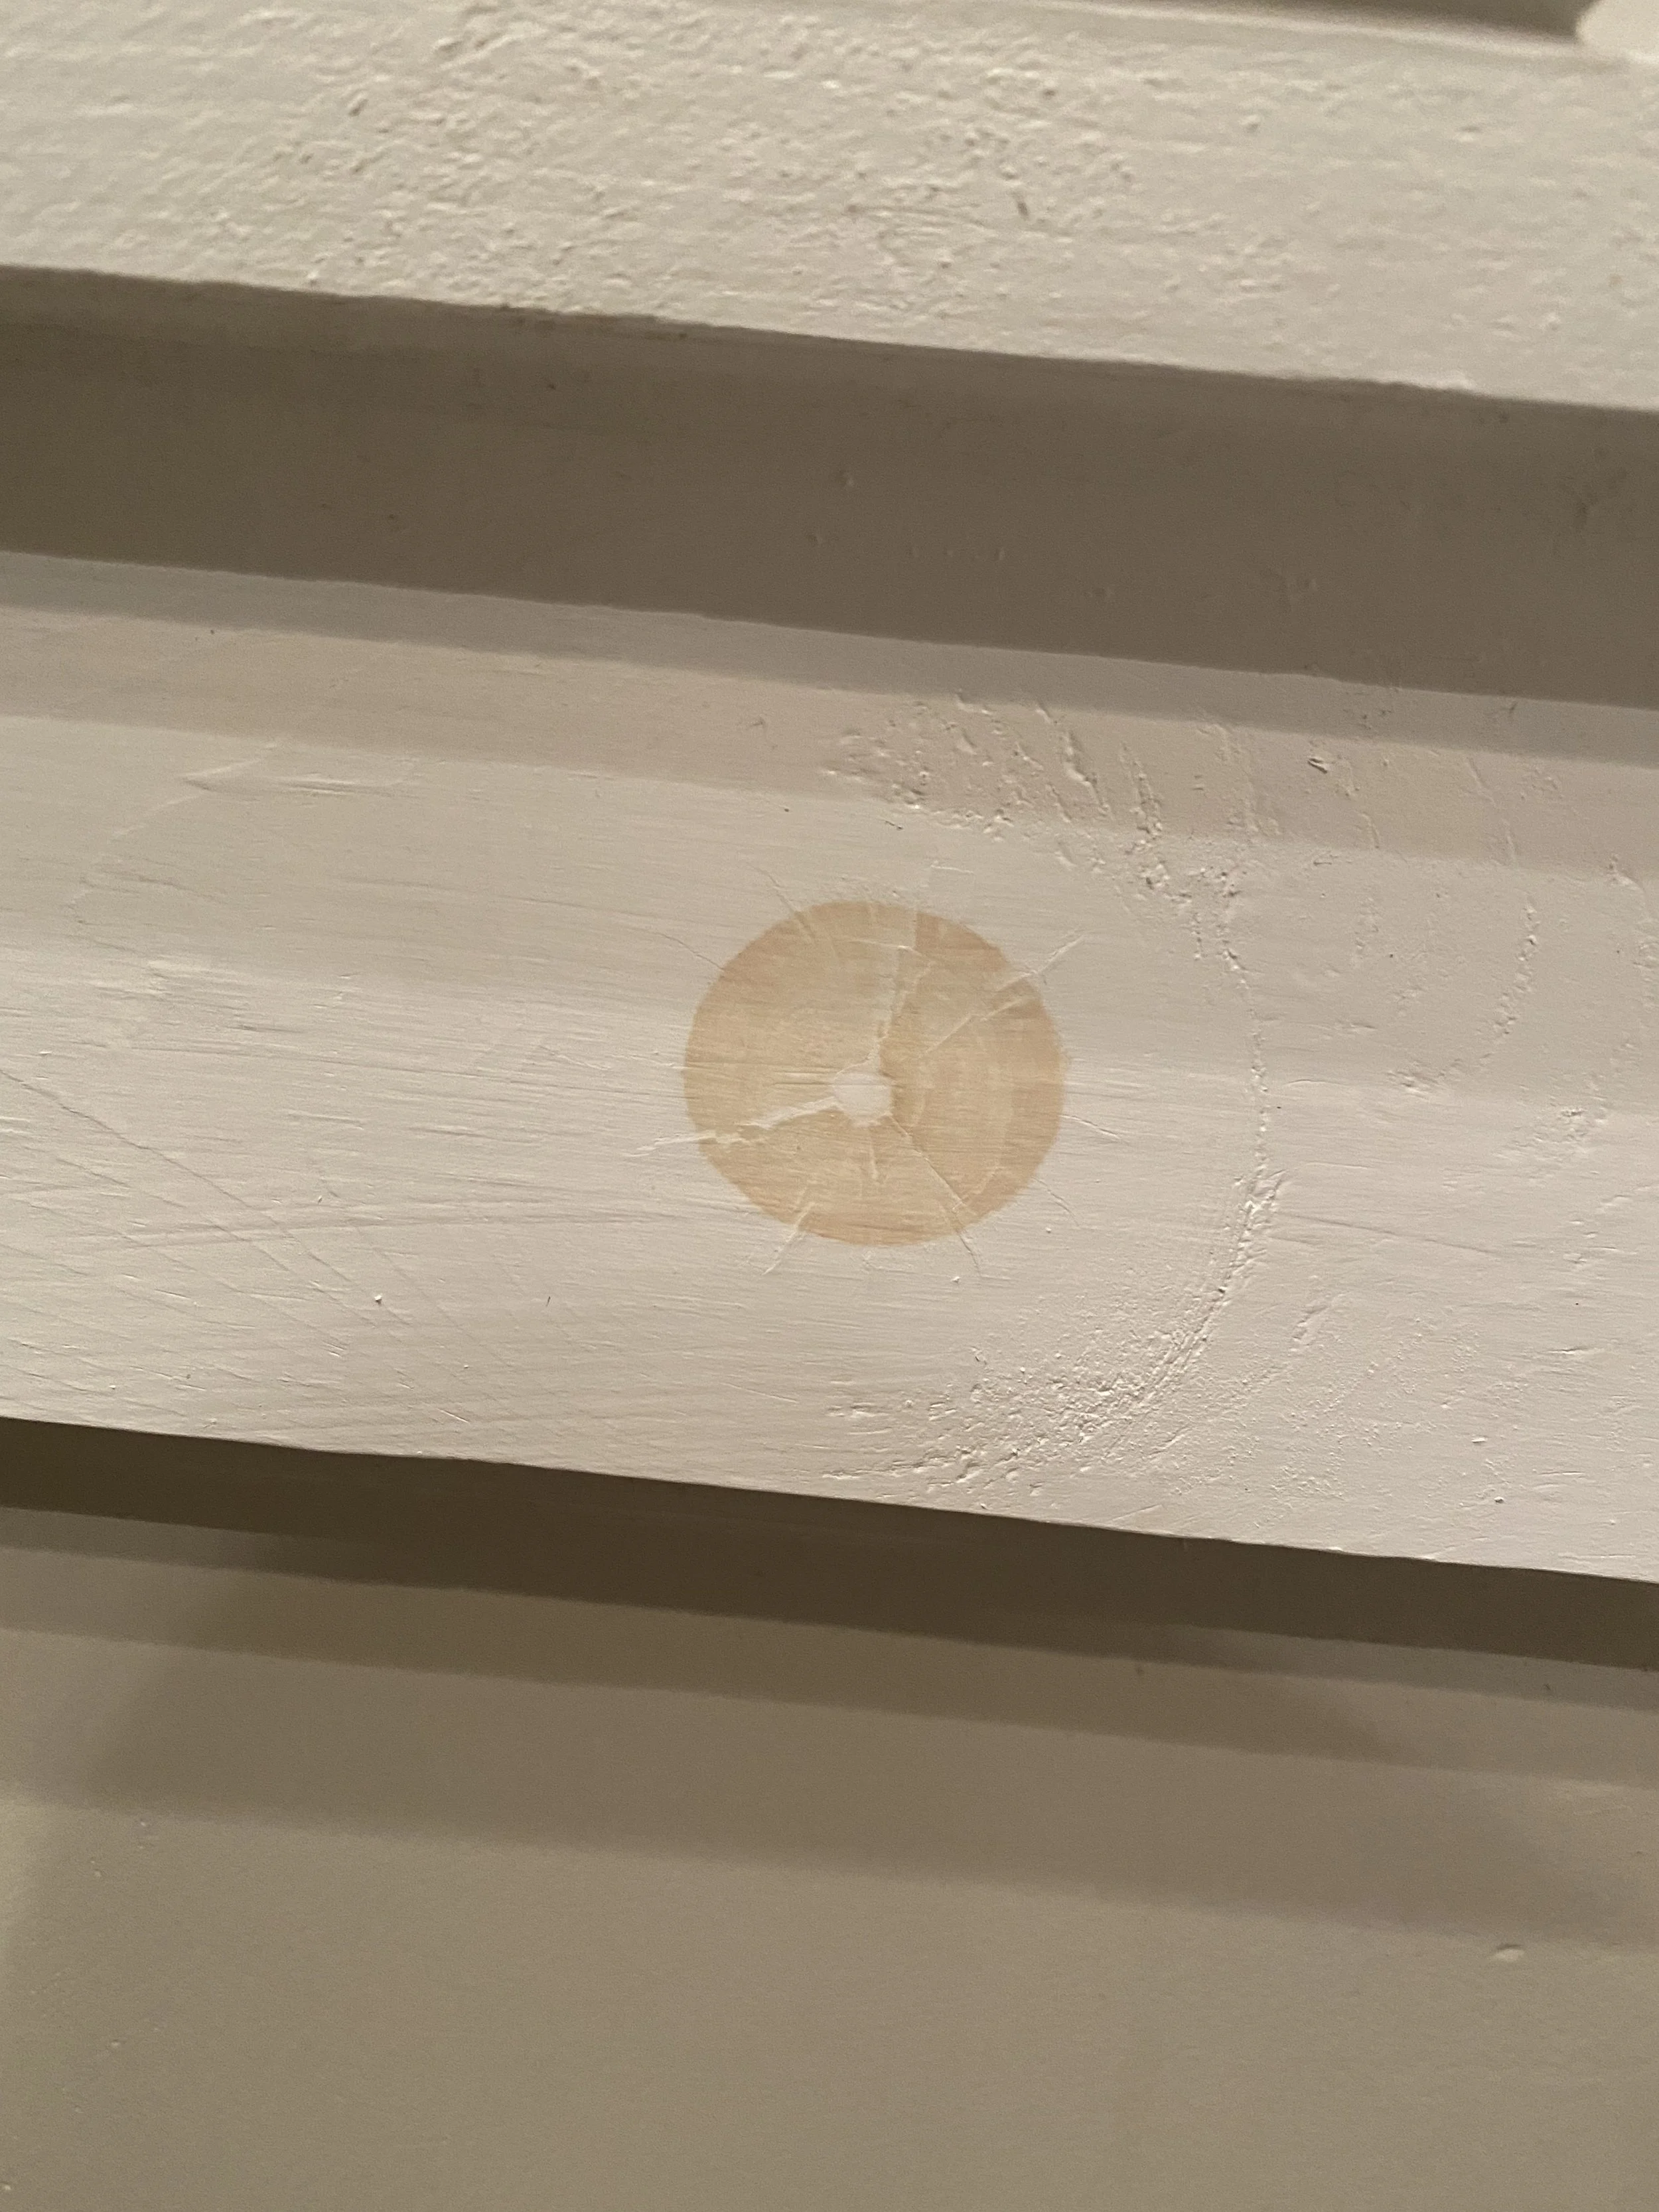
Tanin spot in the kitchen.
So, yes, I lived with those spots for awhile, then sanded, PRIMED (with KILZ) and repainted. LEARN FROM ME! I beg you.
Mistake #2- So, this might be a matter of preference, but the post I read said to put up the raw wood, then fill the holes, sand, prime, caulk and then paint. If I did this again, I would build my trim pieces, fill as much of the wood as I could, sand it, prime, caulk and paint it before putting it up. Then just touch up the nail holes and any other spots with filler, then sand a little, prime, caulk around the whole window and do touch up paint. This is what I got when I was all- ta-da DONNNE and the tape had been removed and my awkward painting angles were revealed from different views of the window…
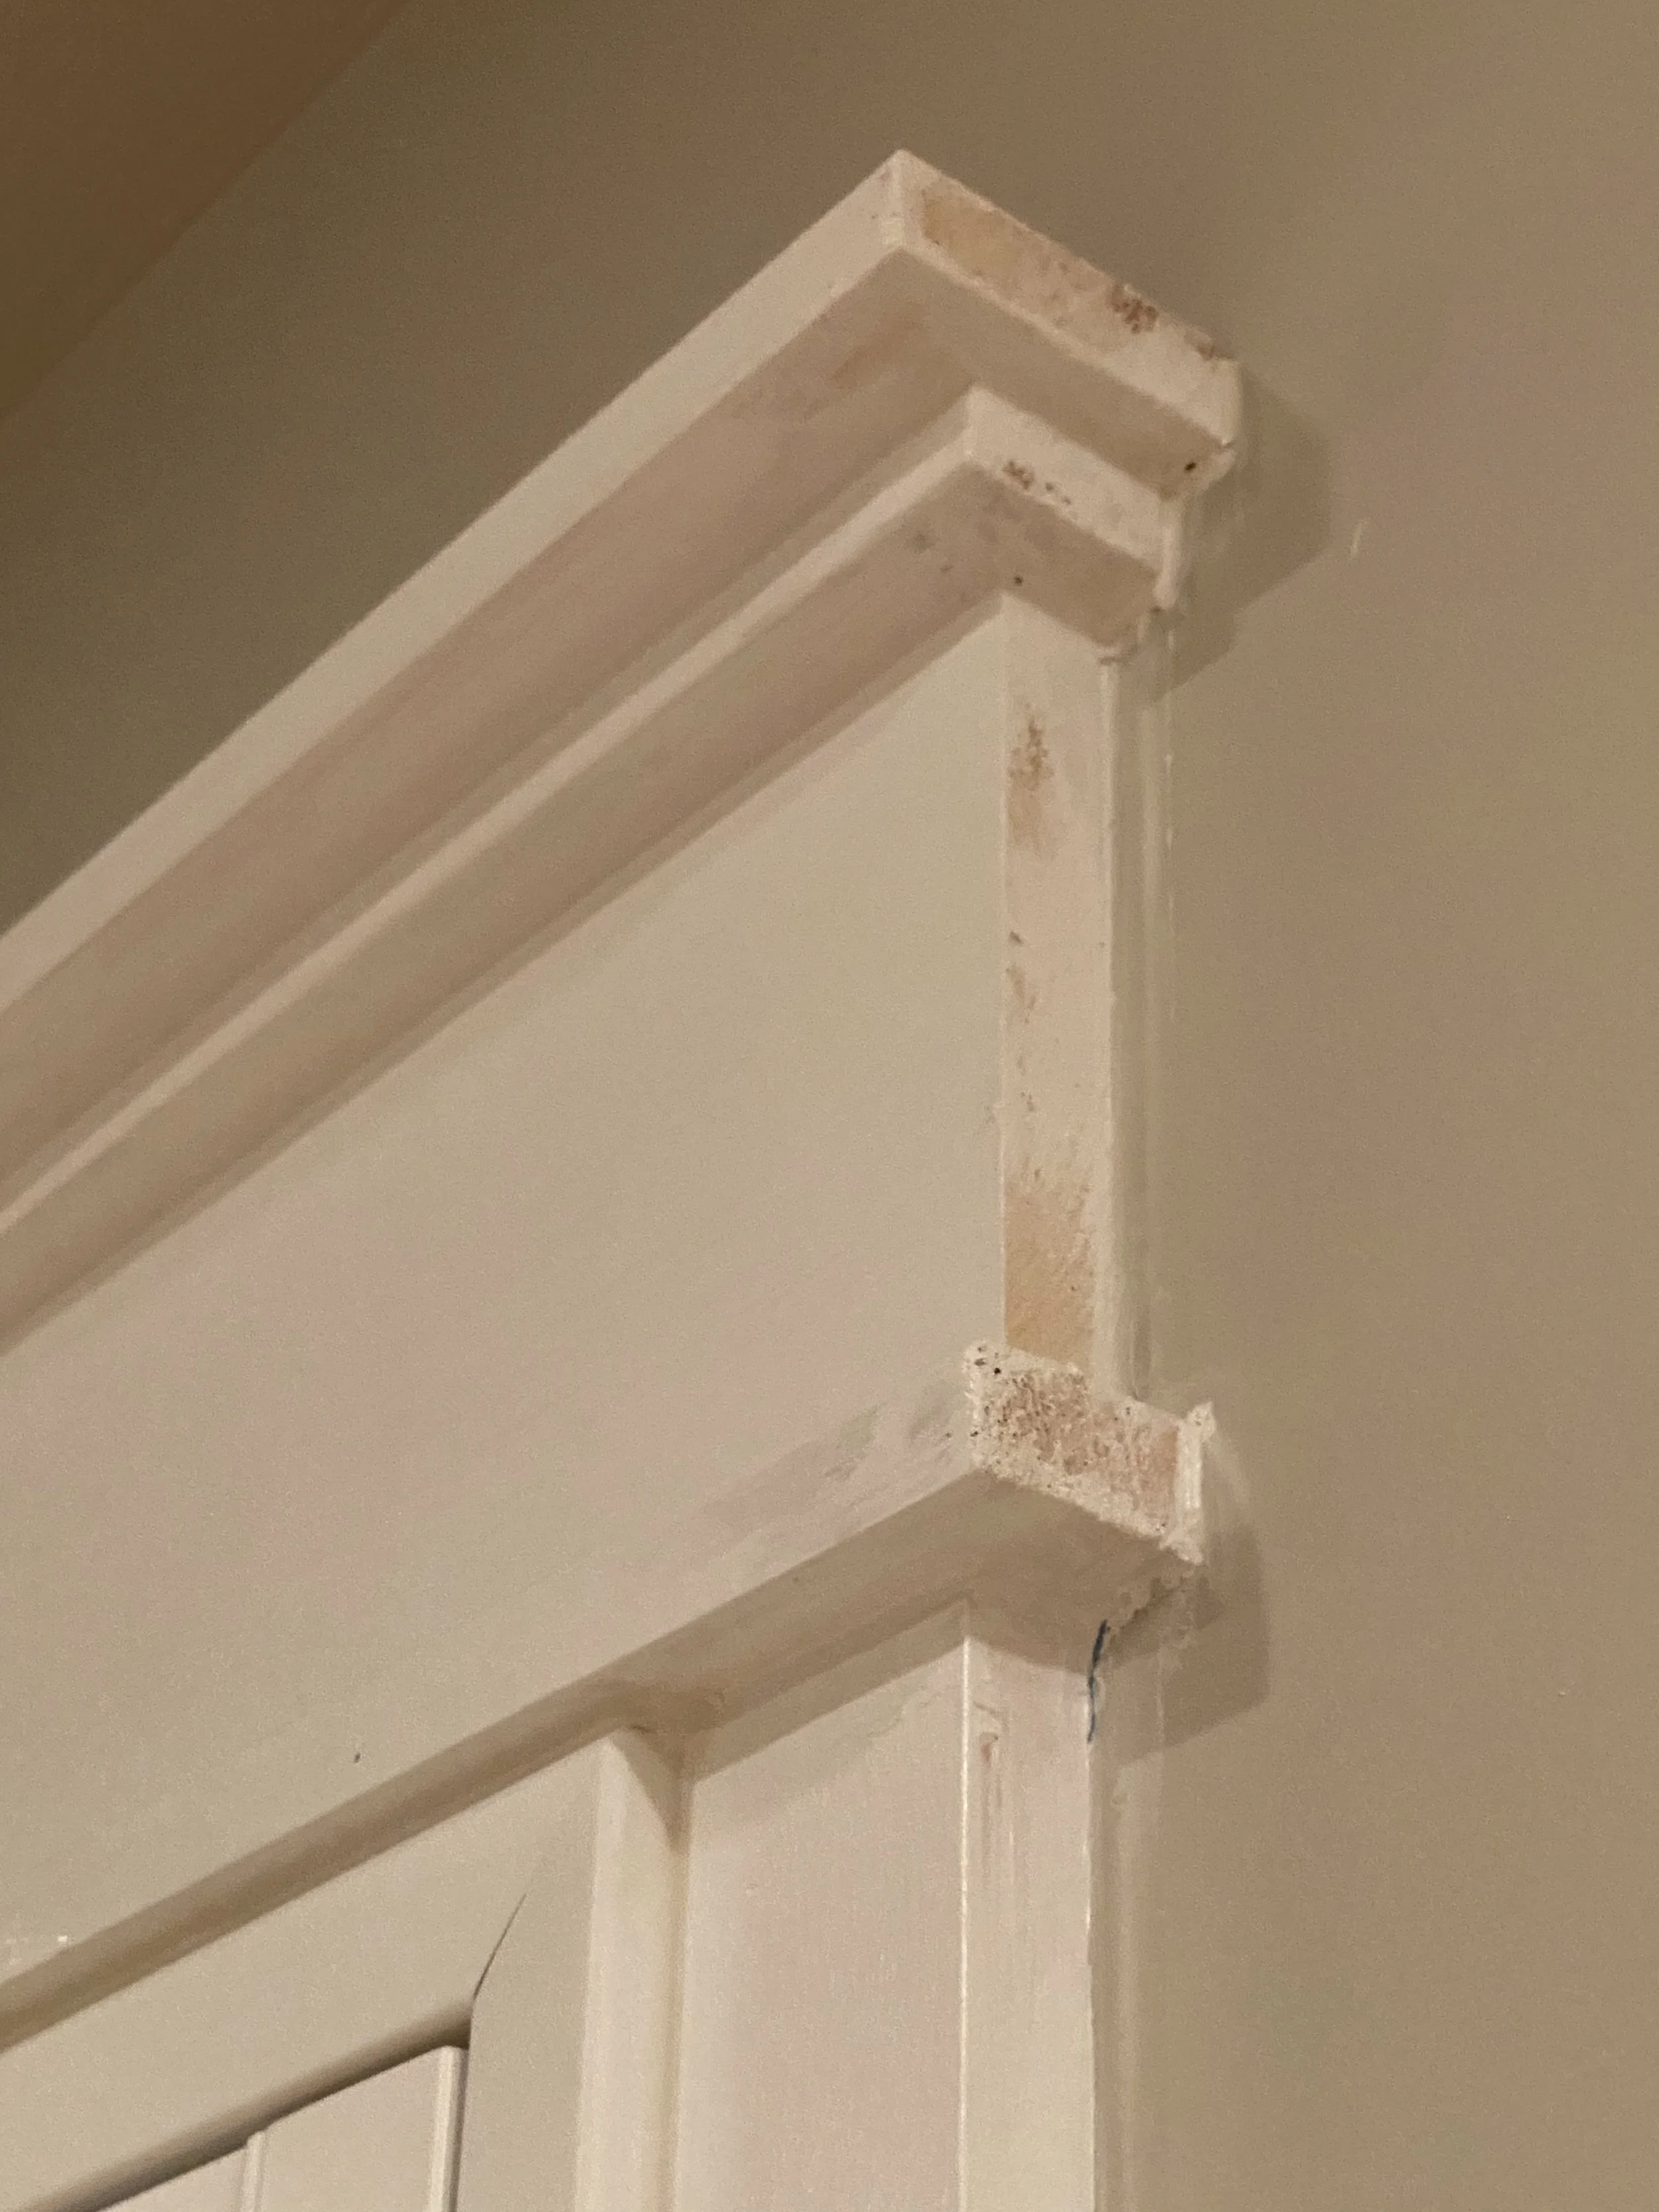
Yes, that is bare wood where I missed painting! (Face palm emoji here.) It was a hard angle to reach and I was so done at this point (did I mention the crying yet?) Anyway, embarrassingly enough, I have not fixed this. You only notice it if you’re IN my shower, so don’t look up if you’re showering in there, I say.
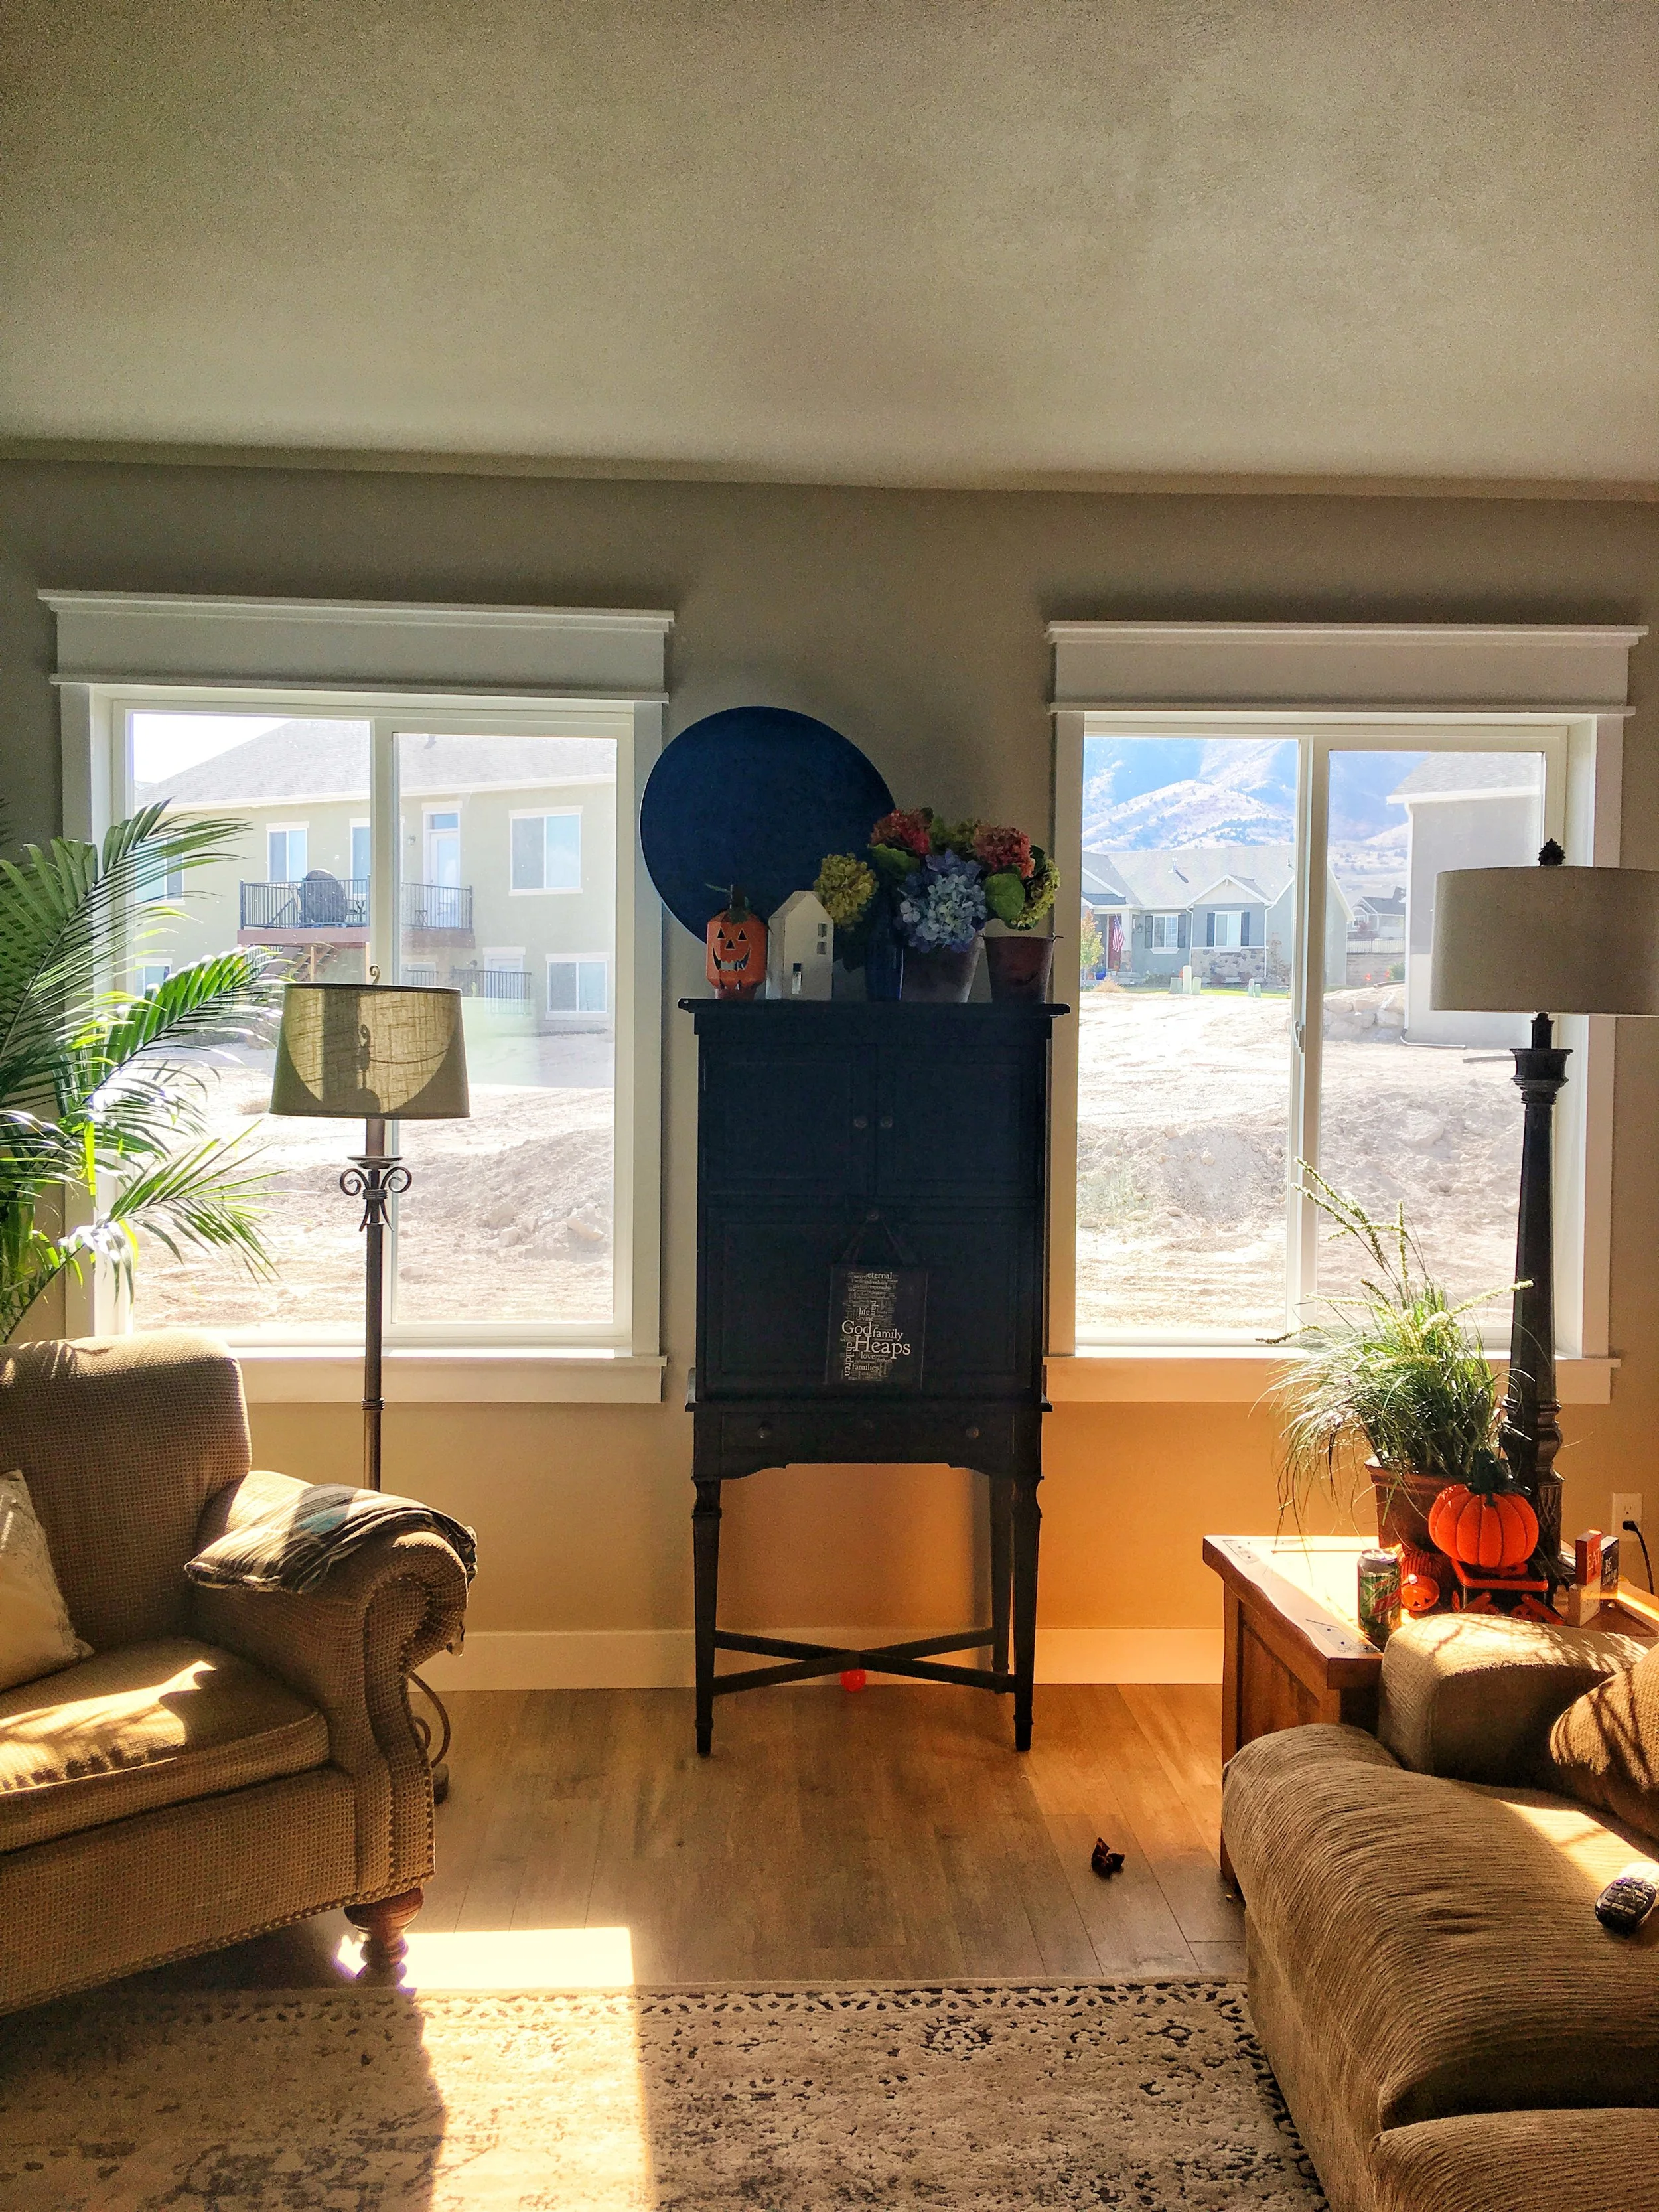
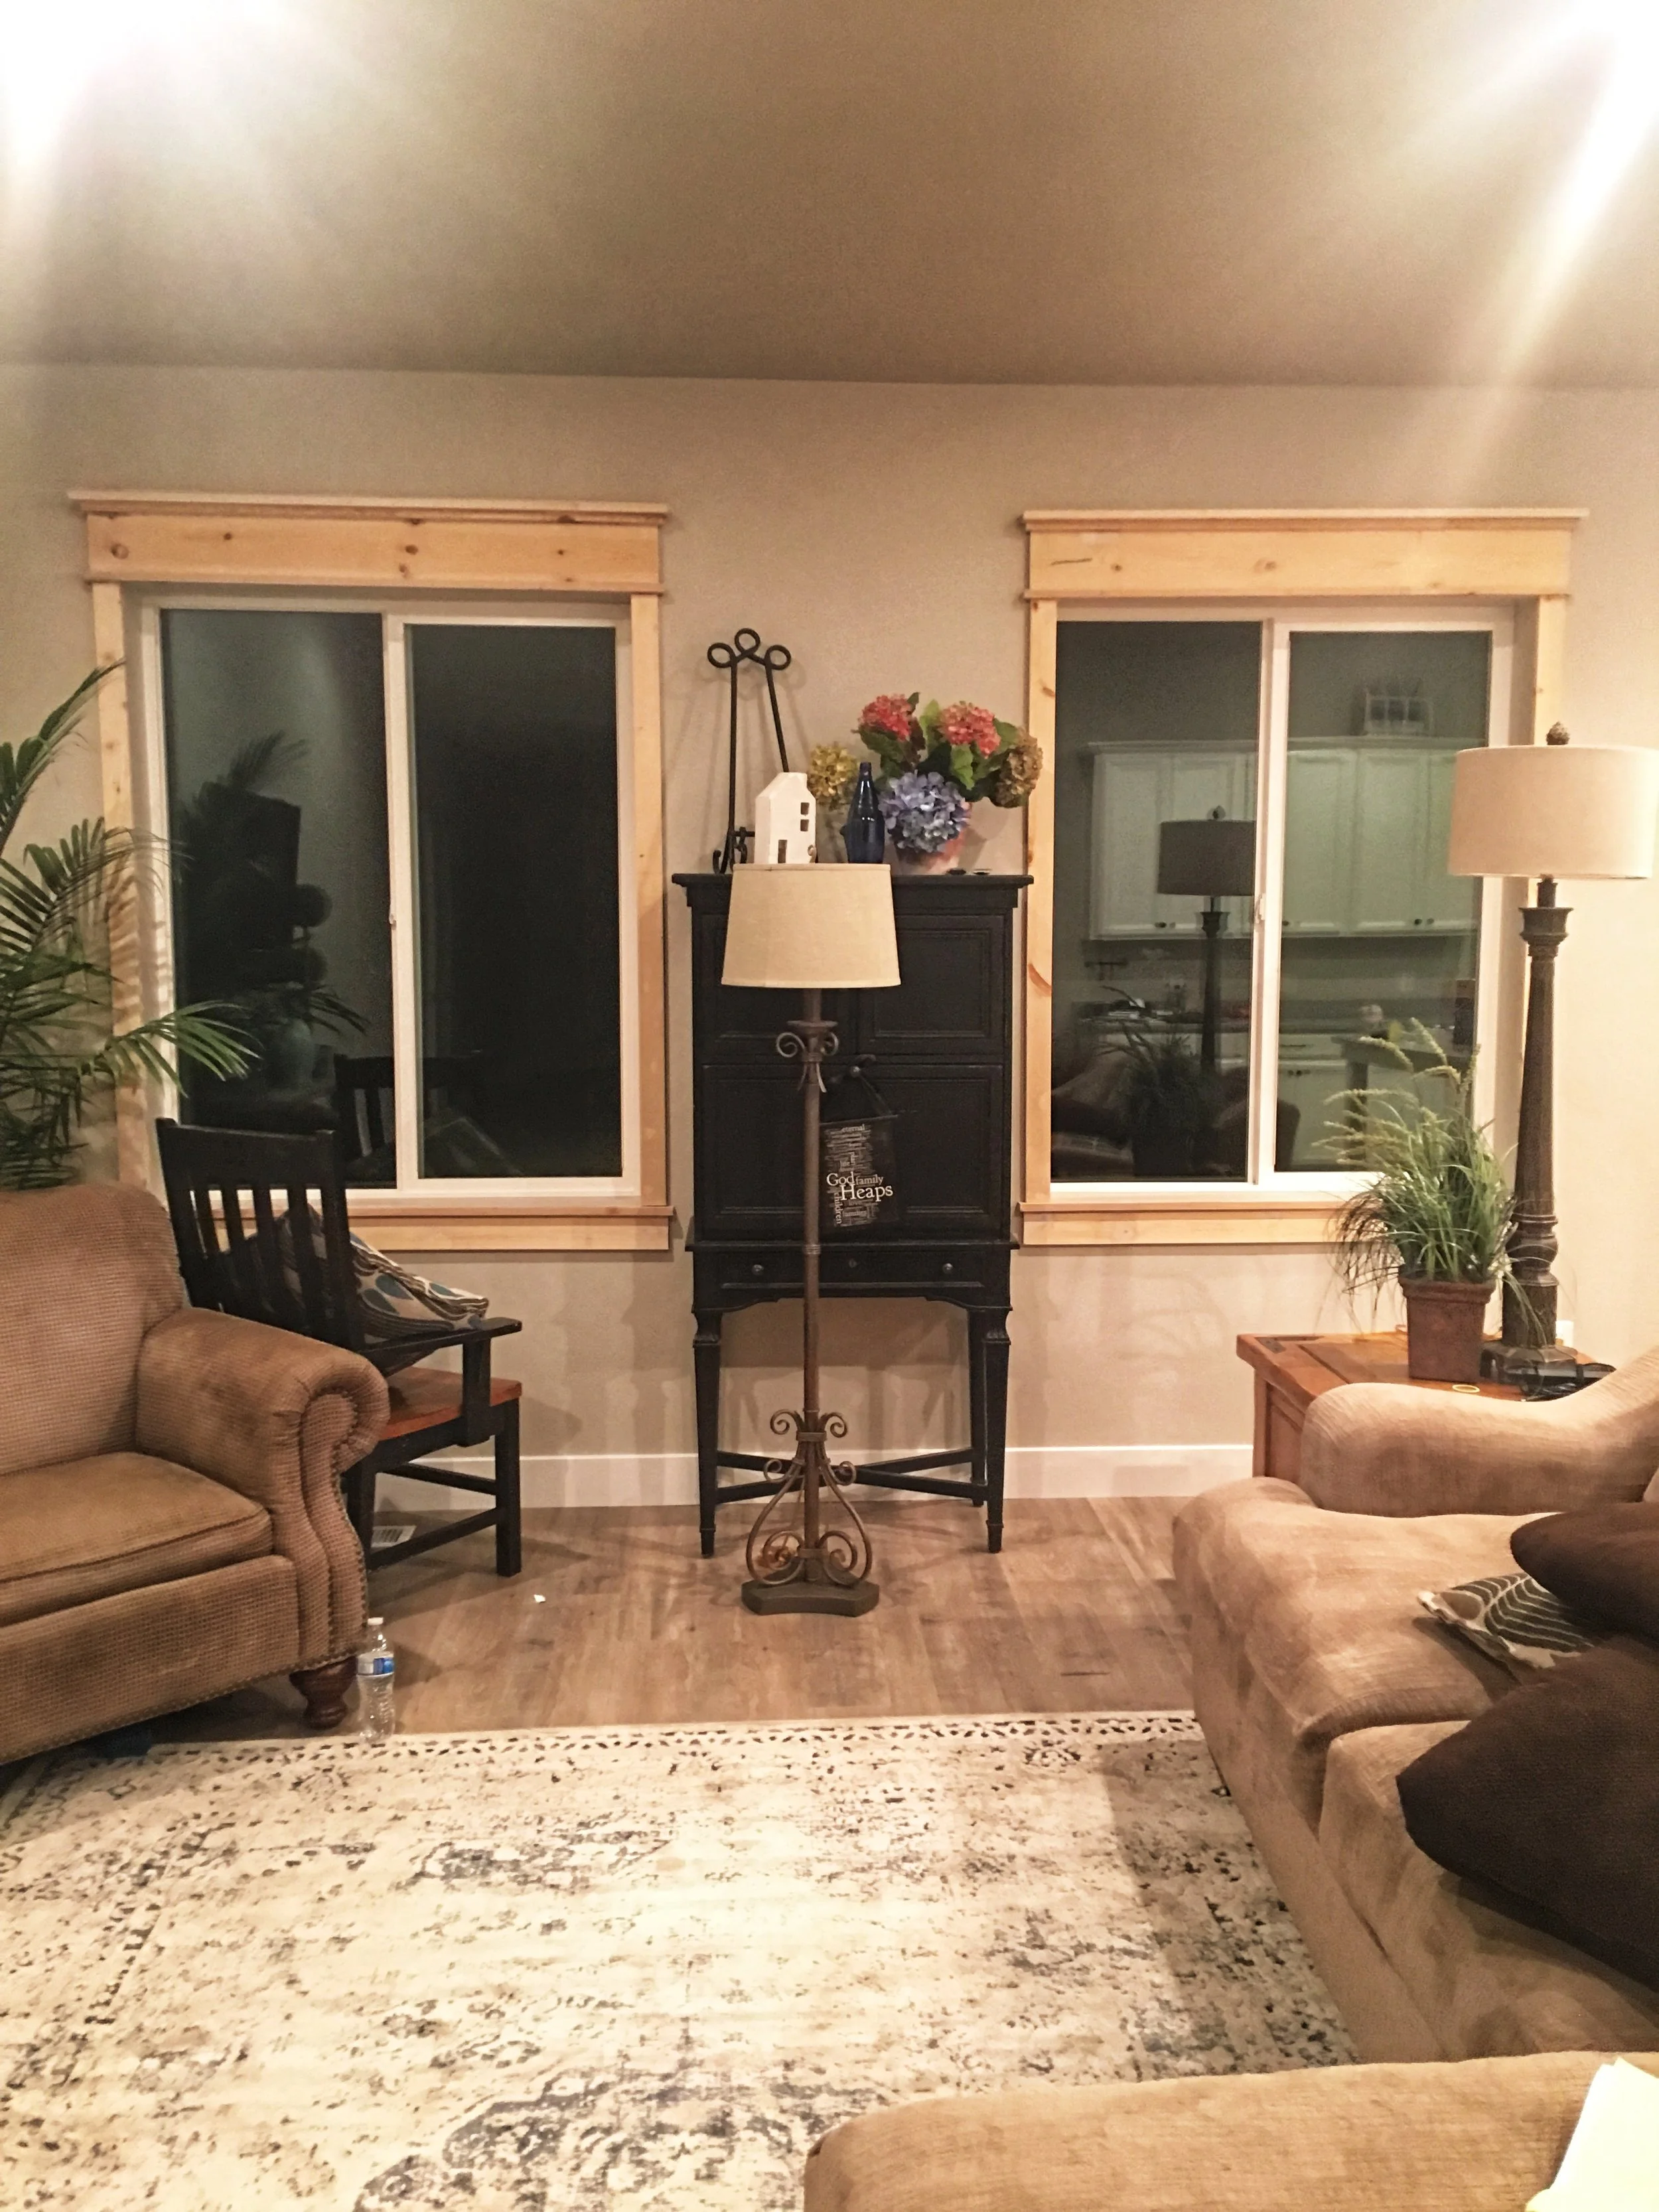
This is how the BEFORE windows looked right after we were done
All in all, I’m so pleased with them. They did take a lot longer than I thought. We had all the raw wood trim up in less than a two day time period (11 windows of various sizes). And I was so proud of us, me and the hubs. We felt super bad A. But then the rest of the wood finishing took about three more weeks of working on it every night after work and on Saturdays. This is where the strong gale came in, it was a bit of a push to get it done. (There were some fights and finger pointing, I think I made the hubby cry at some point.) But YOU’RE above that, you can do it, you’re a fighter! And it was worth it for sure. We spent about $400 total (on all our 11 windows) with wood, filler, paint, caulk, sanding blocks, nails, etc. We just used cheap pine, you can use whatever floats your boat. Here’s another picture of it all done. So pretty, so happy!
Windows AFTER DIY window trim was added.
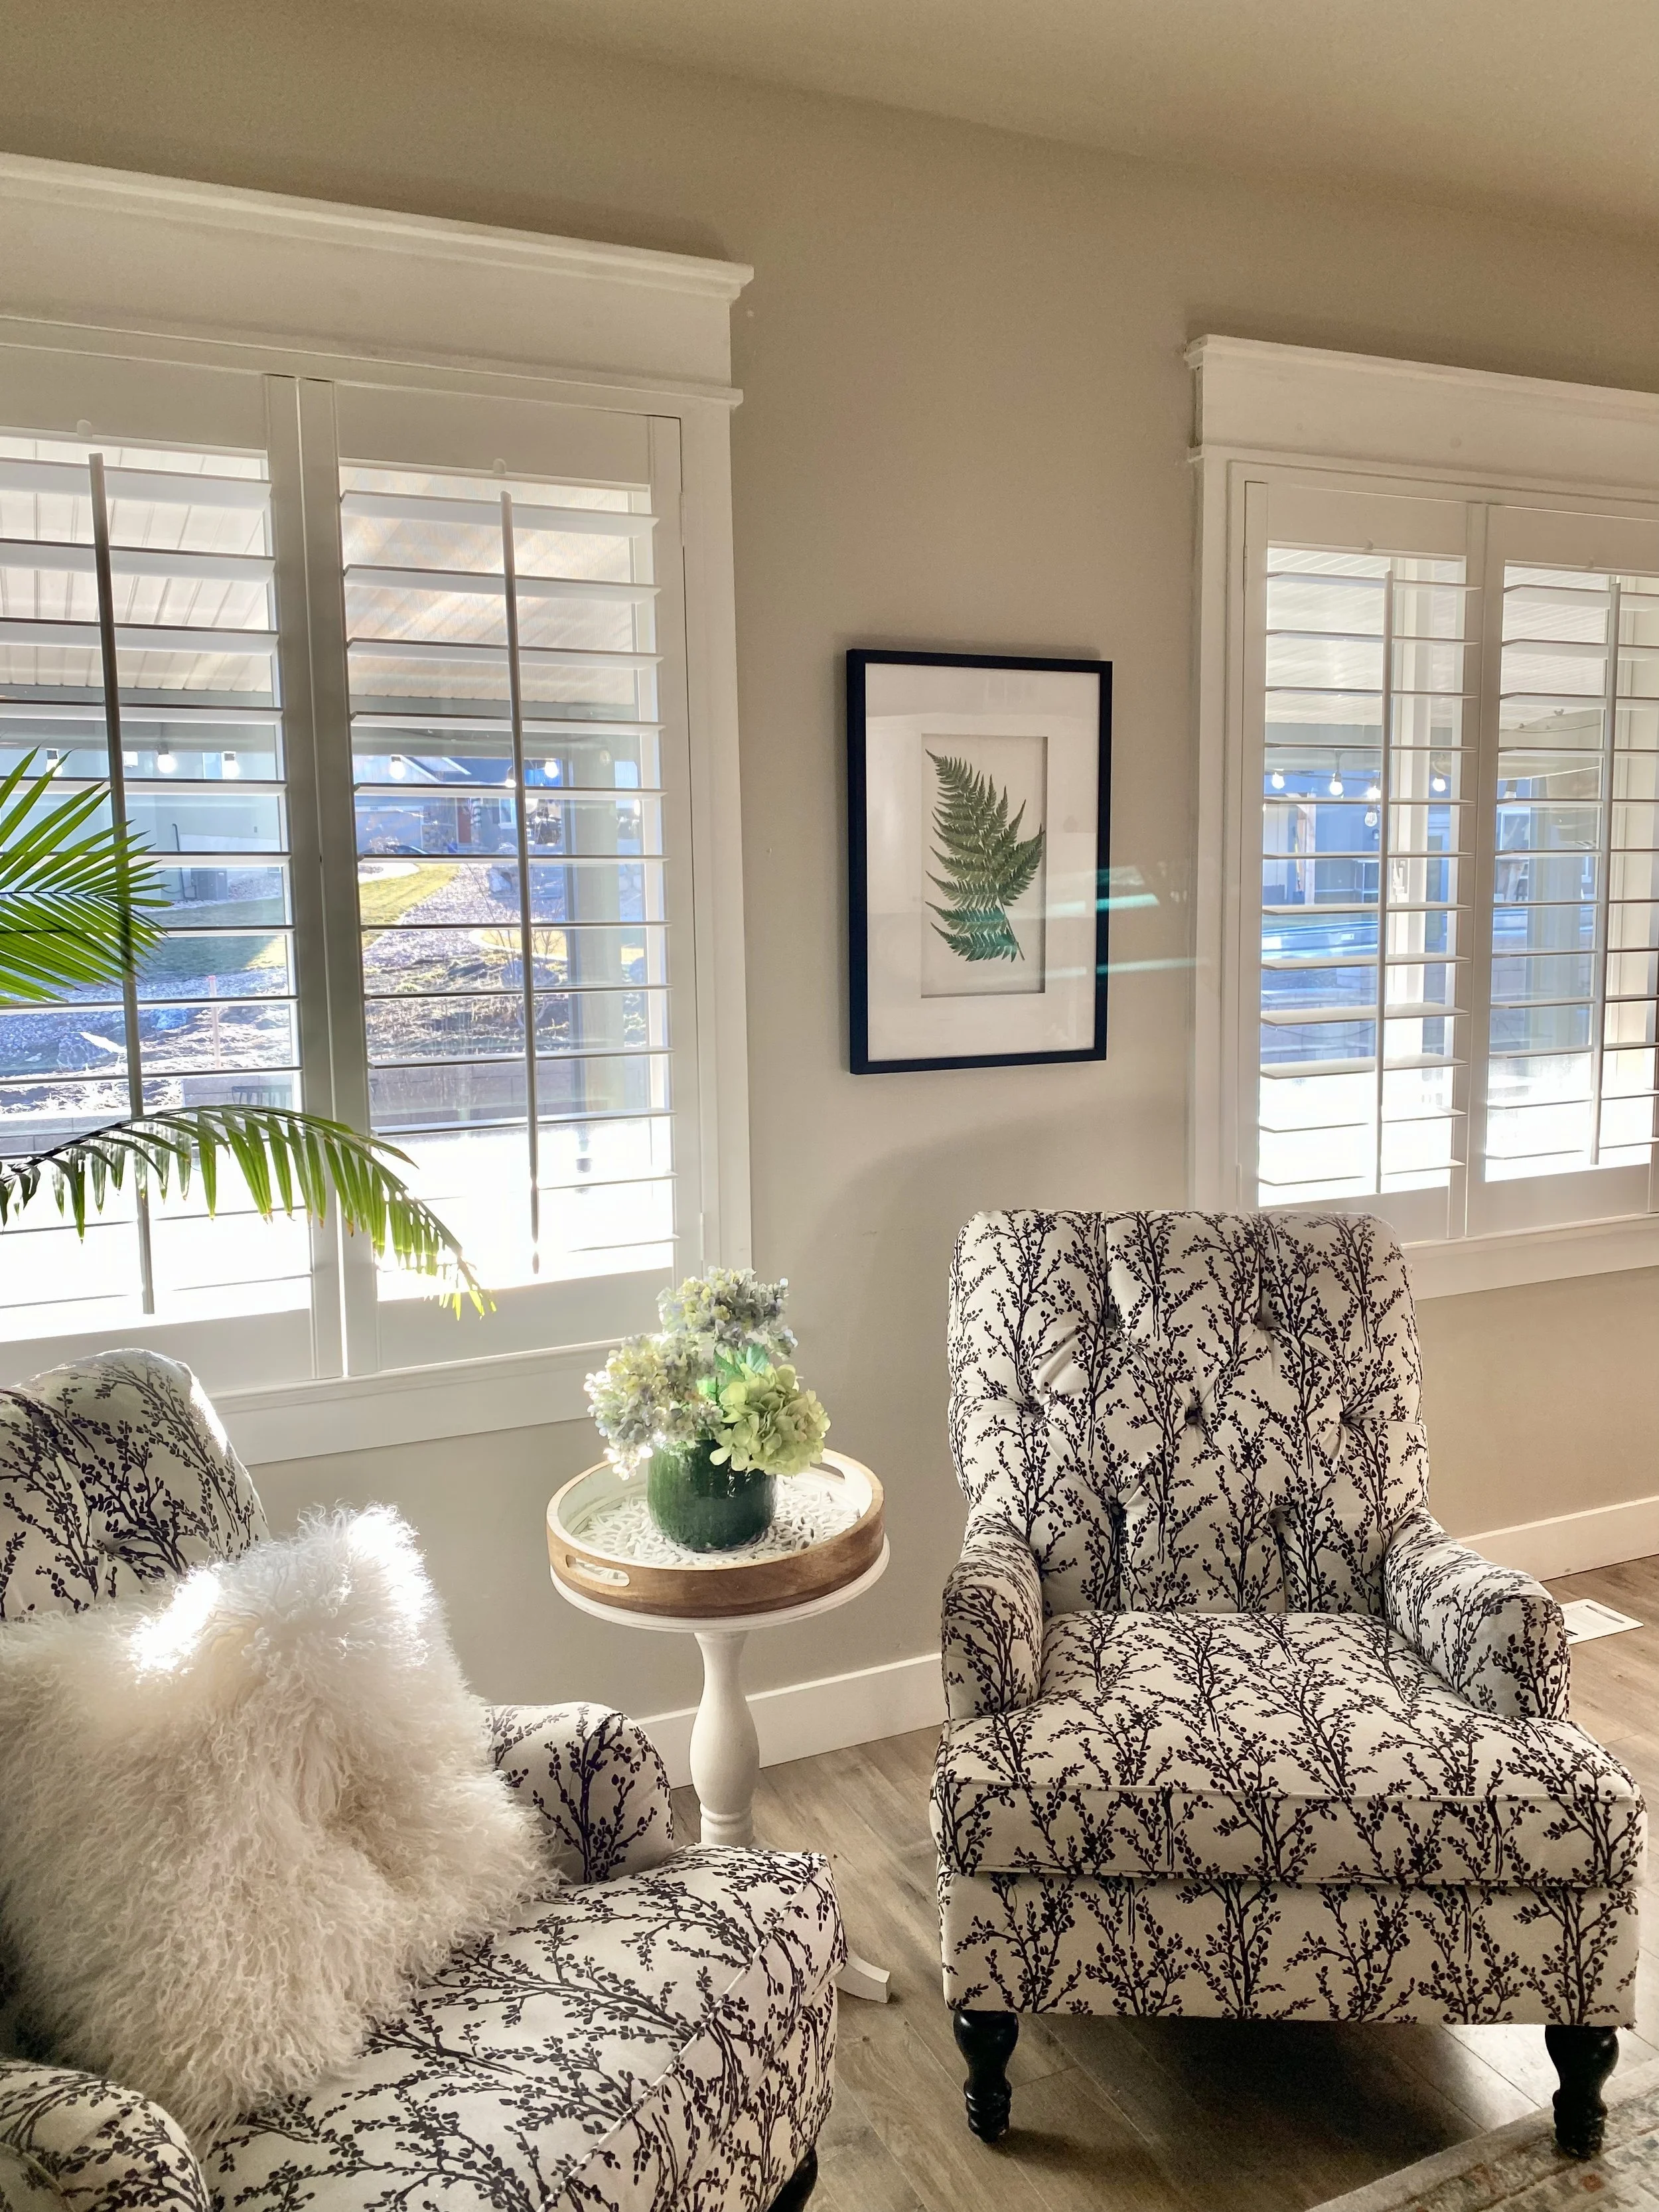
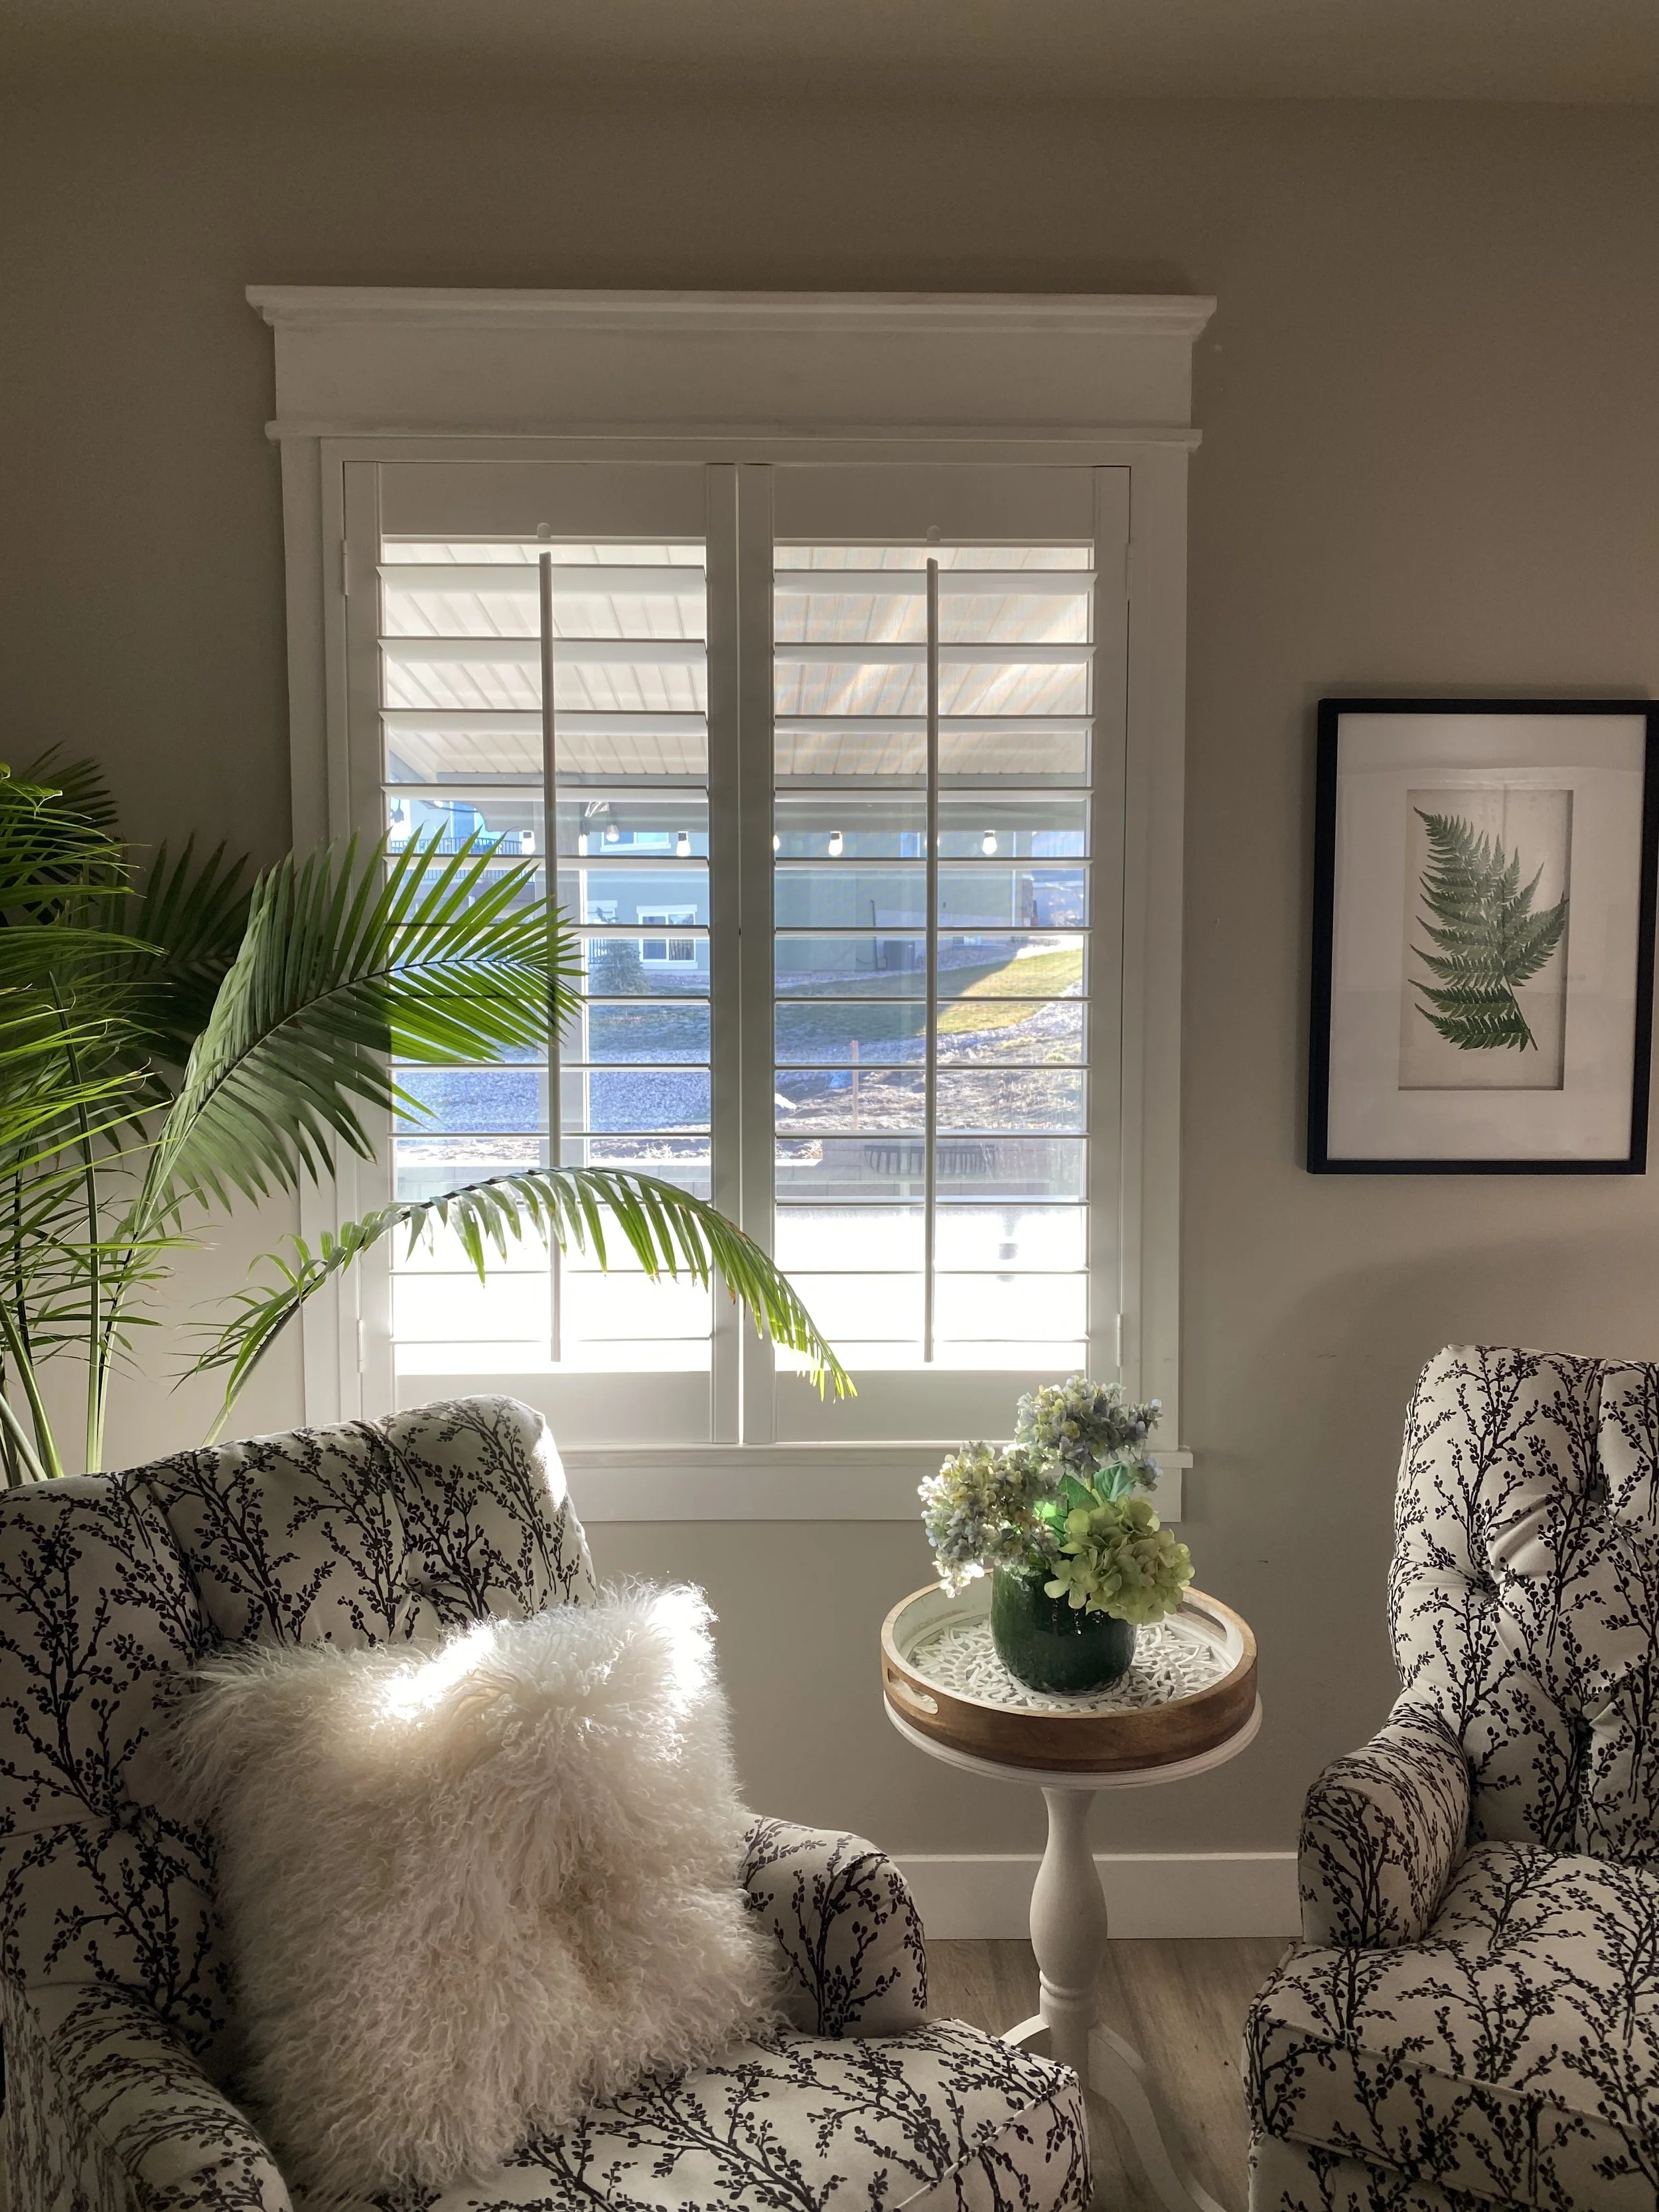
We got some shutters and did a little redecorating in this corner of the room, so this is how it looks today- about two years later.
Have a great day and thanks for stopping by!
Patrice
Window with DIY trim
Window AFTER- all dressed up and looking pretty!